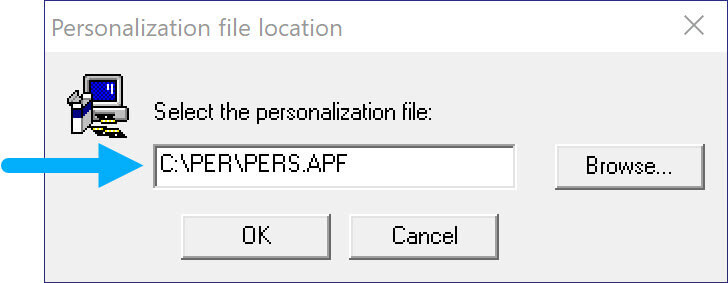
.apf file includes all licenses for purchased modules. During installation, the user must select the .apf file that was sent to them by ATIR when asked for a personalization file.
Server
A “server” can be any computer that is connected to the network.

* Windows will normally download and install the driver the first time you plug in a key.
Station
A “station” can be any computer that is connected to the network, and wants to run STRAP/BEAMD.


The float license is protected by a user name and password, an active internet connection is required. The purchased software modules are bundled into a SET. Each SET can include multiple software, software modules and multiple stimulatingly users based on the purchase. Multiple computers can be registered to a SET but only a purchased number of licenses can work at the same time. A computer can be registered to multiple SETs as well. After the user’s computer is registered to a SET, this computer can login and occupy a license if the license is available. Once the computer is logged in, it occupies the license until the user actively log out or change to a different SET if available.
REGISTER A COMPUTER TO A SET
The computer registration window will show up after running the software for the first time or by clicking HELP > license management > Register to another set.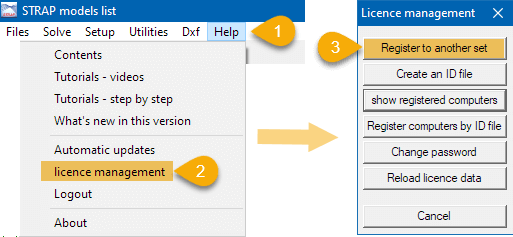 When registering a new computer to a SET the following screen will show up –
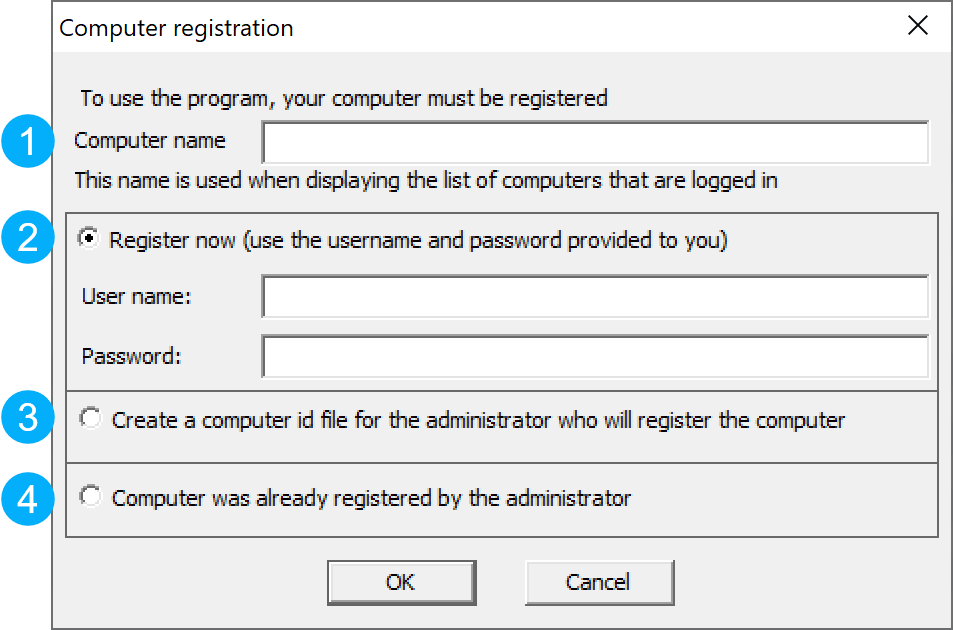 1. Computer name. The computer name is the name that will be given to the registered computer. It is important that the computer name can be recognized by all the users. Three options are available for computer registration for a given SET –
2. Register now by user name & password. If the user has the SET’s user name and password, enter them under register now and click OK.
3. Create a computer “id file”. This option is intended for setups where the computer registration is done by the system administrator who coordinates the registration and has the SET’s user name and password. After selecting this option, the program will create a registry file whose name will be the same as the computer name with the “.cid” This file should be sent to the company system administrator for registration.
* This option is intended for security reasons when a company doesn’t want that all the users will have the user name and password.
The computer “id file” can also be created from HELP > license management > create an ID file –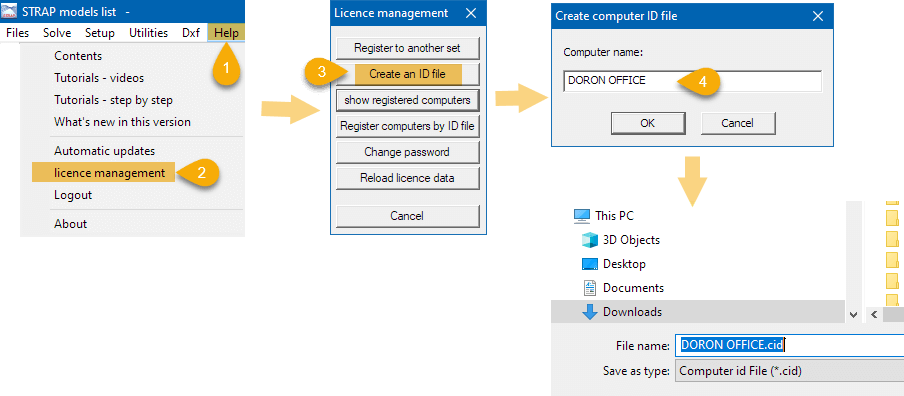 To register a computer with an “id file” by the administrator click HELP > license management >Register computers by ID file > Select the id file “.cid” extension (multiple files can be selected) > Enter the SET’s username and password.
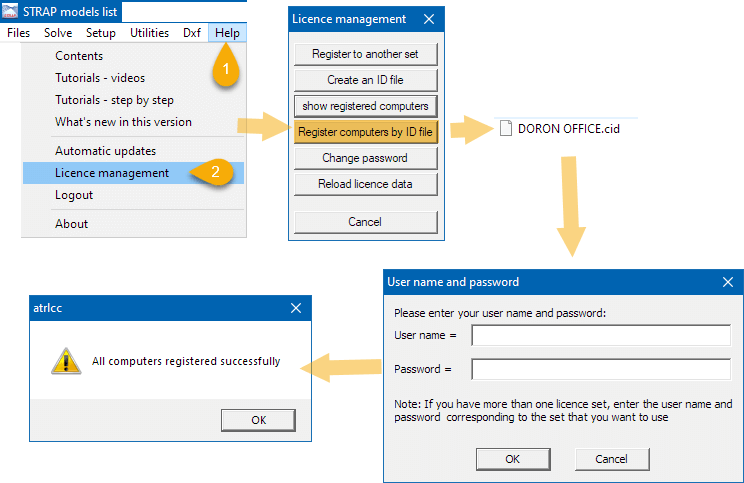
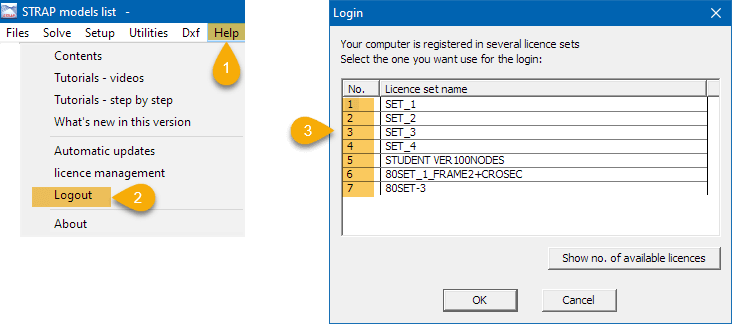
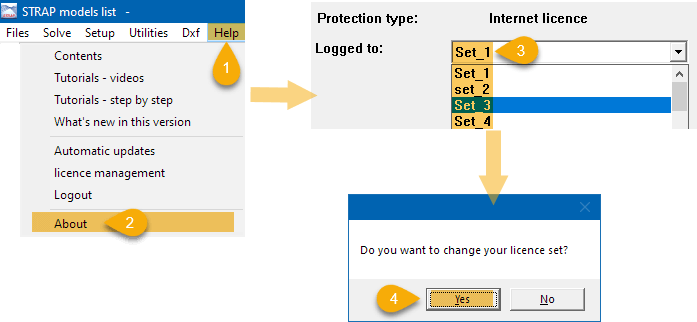
TRANSITION BETWEEN SETS
As mentioned earlier, a single computer can be registered to multiple SETS. There 2 ways to transfer between SETS –
SHOW REGISTERED AND LOGGED COMPUTERS
With a SET’s username and password, you can view the list of registered and logged computers. Click HELP > license management > show registered computers > Enter the SET’s user name & password.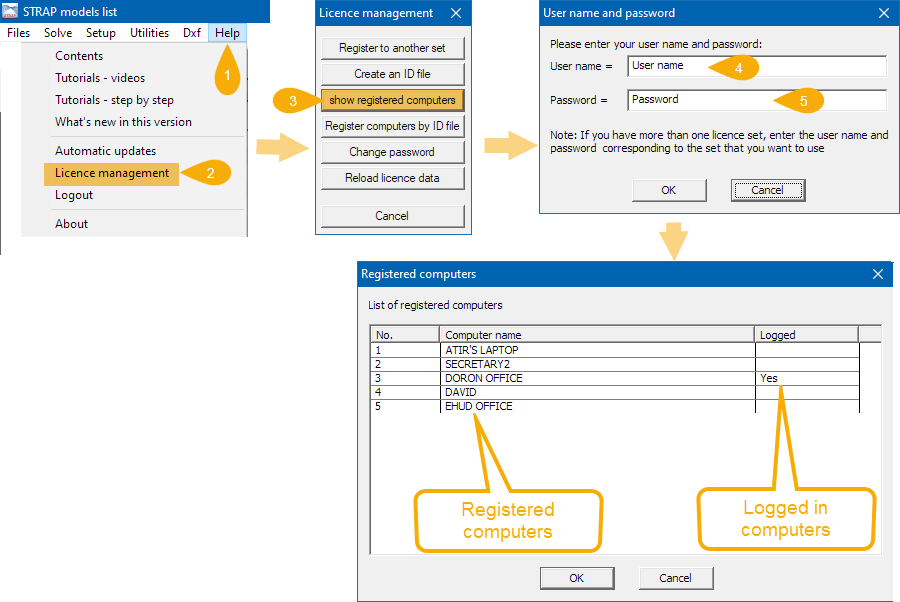 The registered computers window will show up and display the names of the computers as defined at the time of registration. The program will also display for each registered computer whether it is logged. With the help of this option, you can check by which computers the license is occupied.
CHANGE PASSWORD
The user may change the SET’s password, To change the password click HELP > license management > change password > insert the current user name and password > Enter a new password.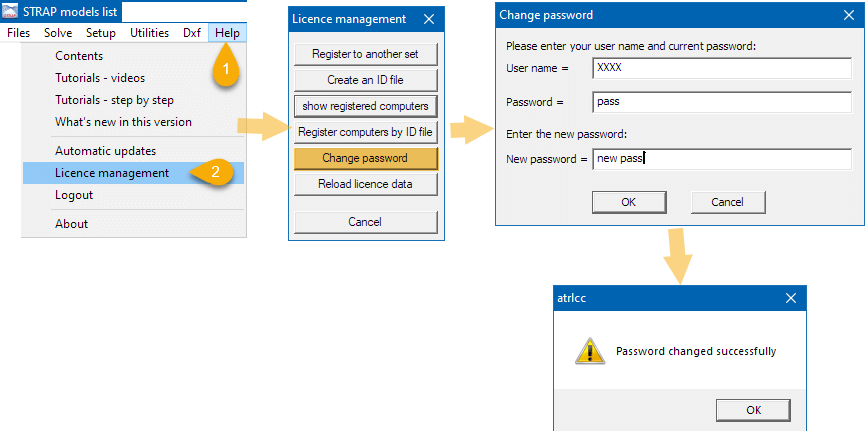
RELOAD LICENSE DATA
Changes to the license, such as adding modules, increasing the number of licenses, extending the validity of the license, etc., are updated automatically every few hours. To reload the license data manually click HELP > License management > Reload license data.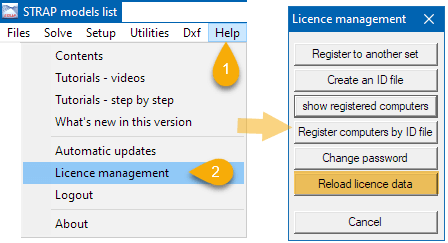
Before starting, make sure there are model files within the working folder where the models are saved.
STRAP’s print drawing settings are set to greyscale. To set a color for printing drawings from the models tab > Setup > Print parameters > Under “Print drawing” select general > Check the option “Use color for printing drawings”.
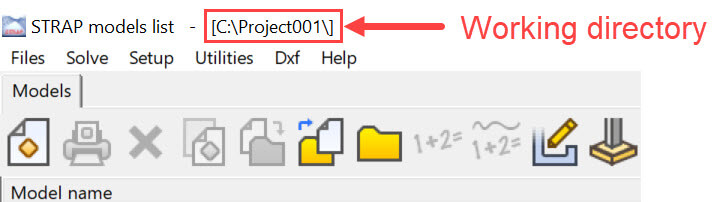
The models files are located in the working directory. The files path is visible at the top left corner of the models tab window.
STRAP automatic updates system is unable to connect to ATIR’s servers for updates. Opening FTP ports 20,21,22 on your network should resolve the issue.
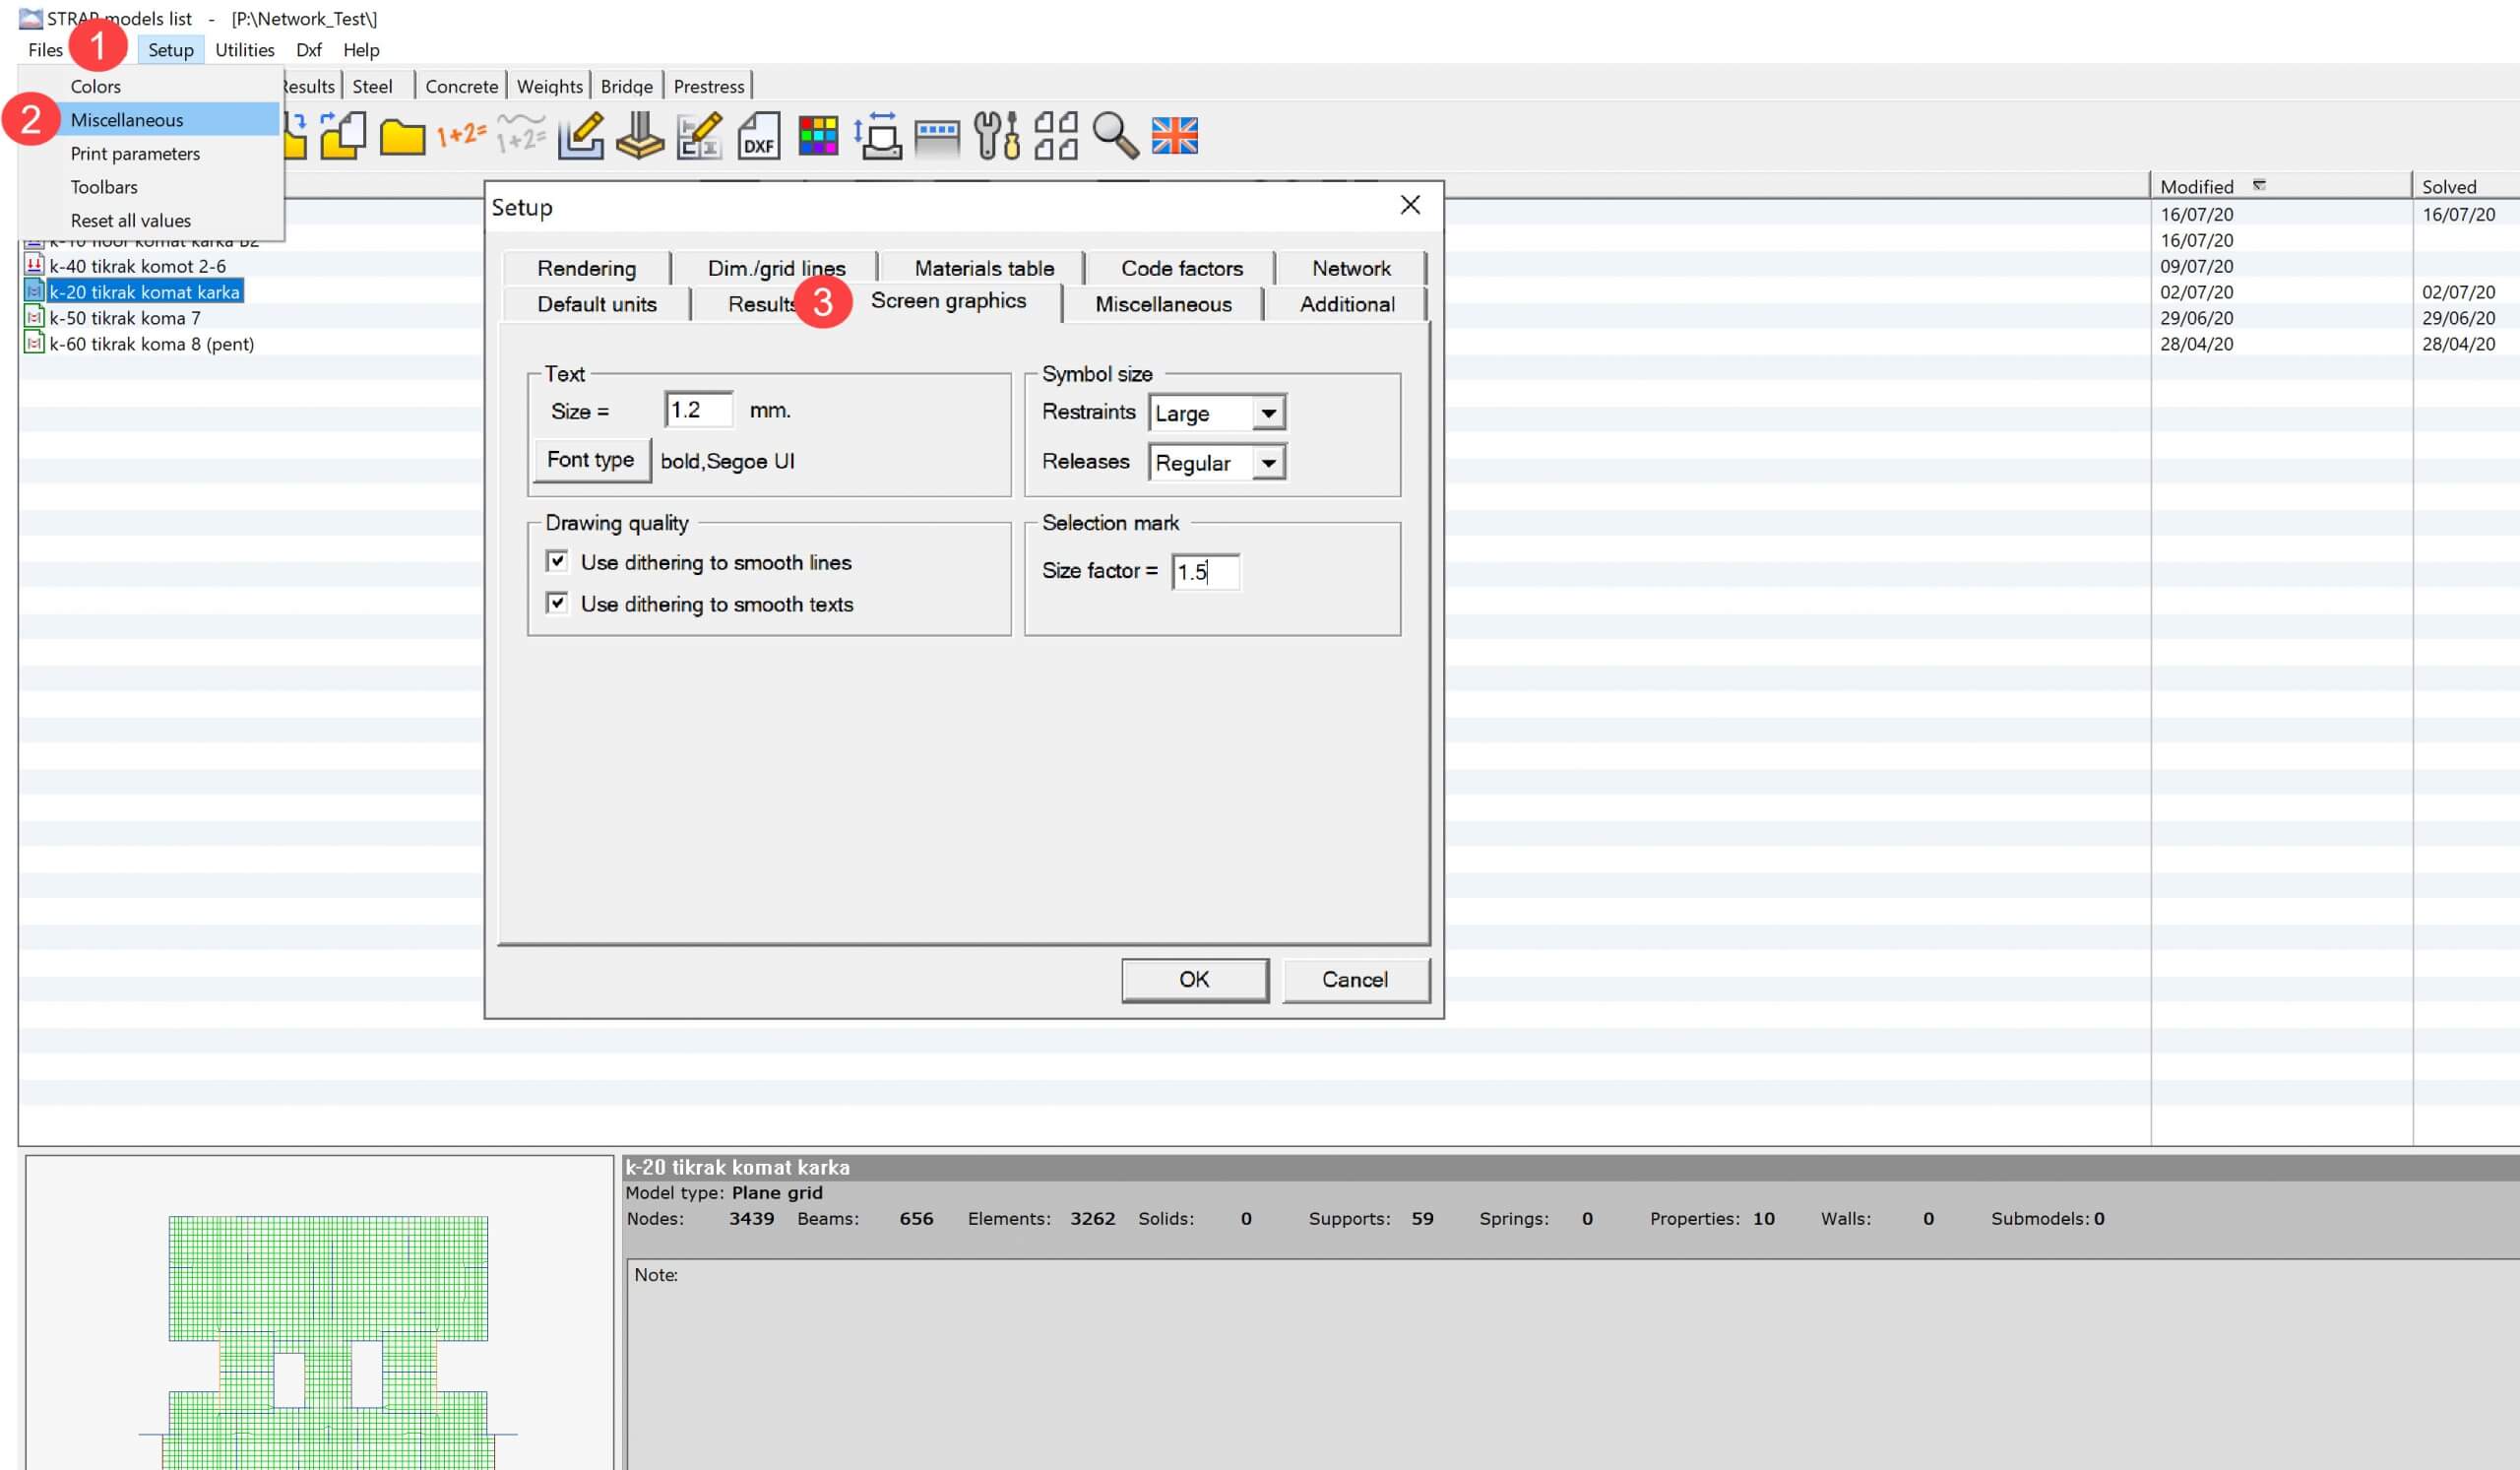
This setup feature is usually useful for screens with 4K resolution.
From the Models tab > Setup > Miscellaneous > Screen graphics
This feature is useful for BIM software collaboration.
From the Geometry tab > File > Create an IFC file
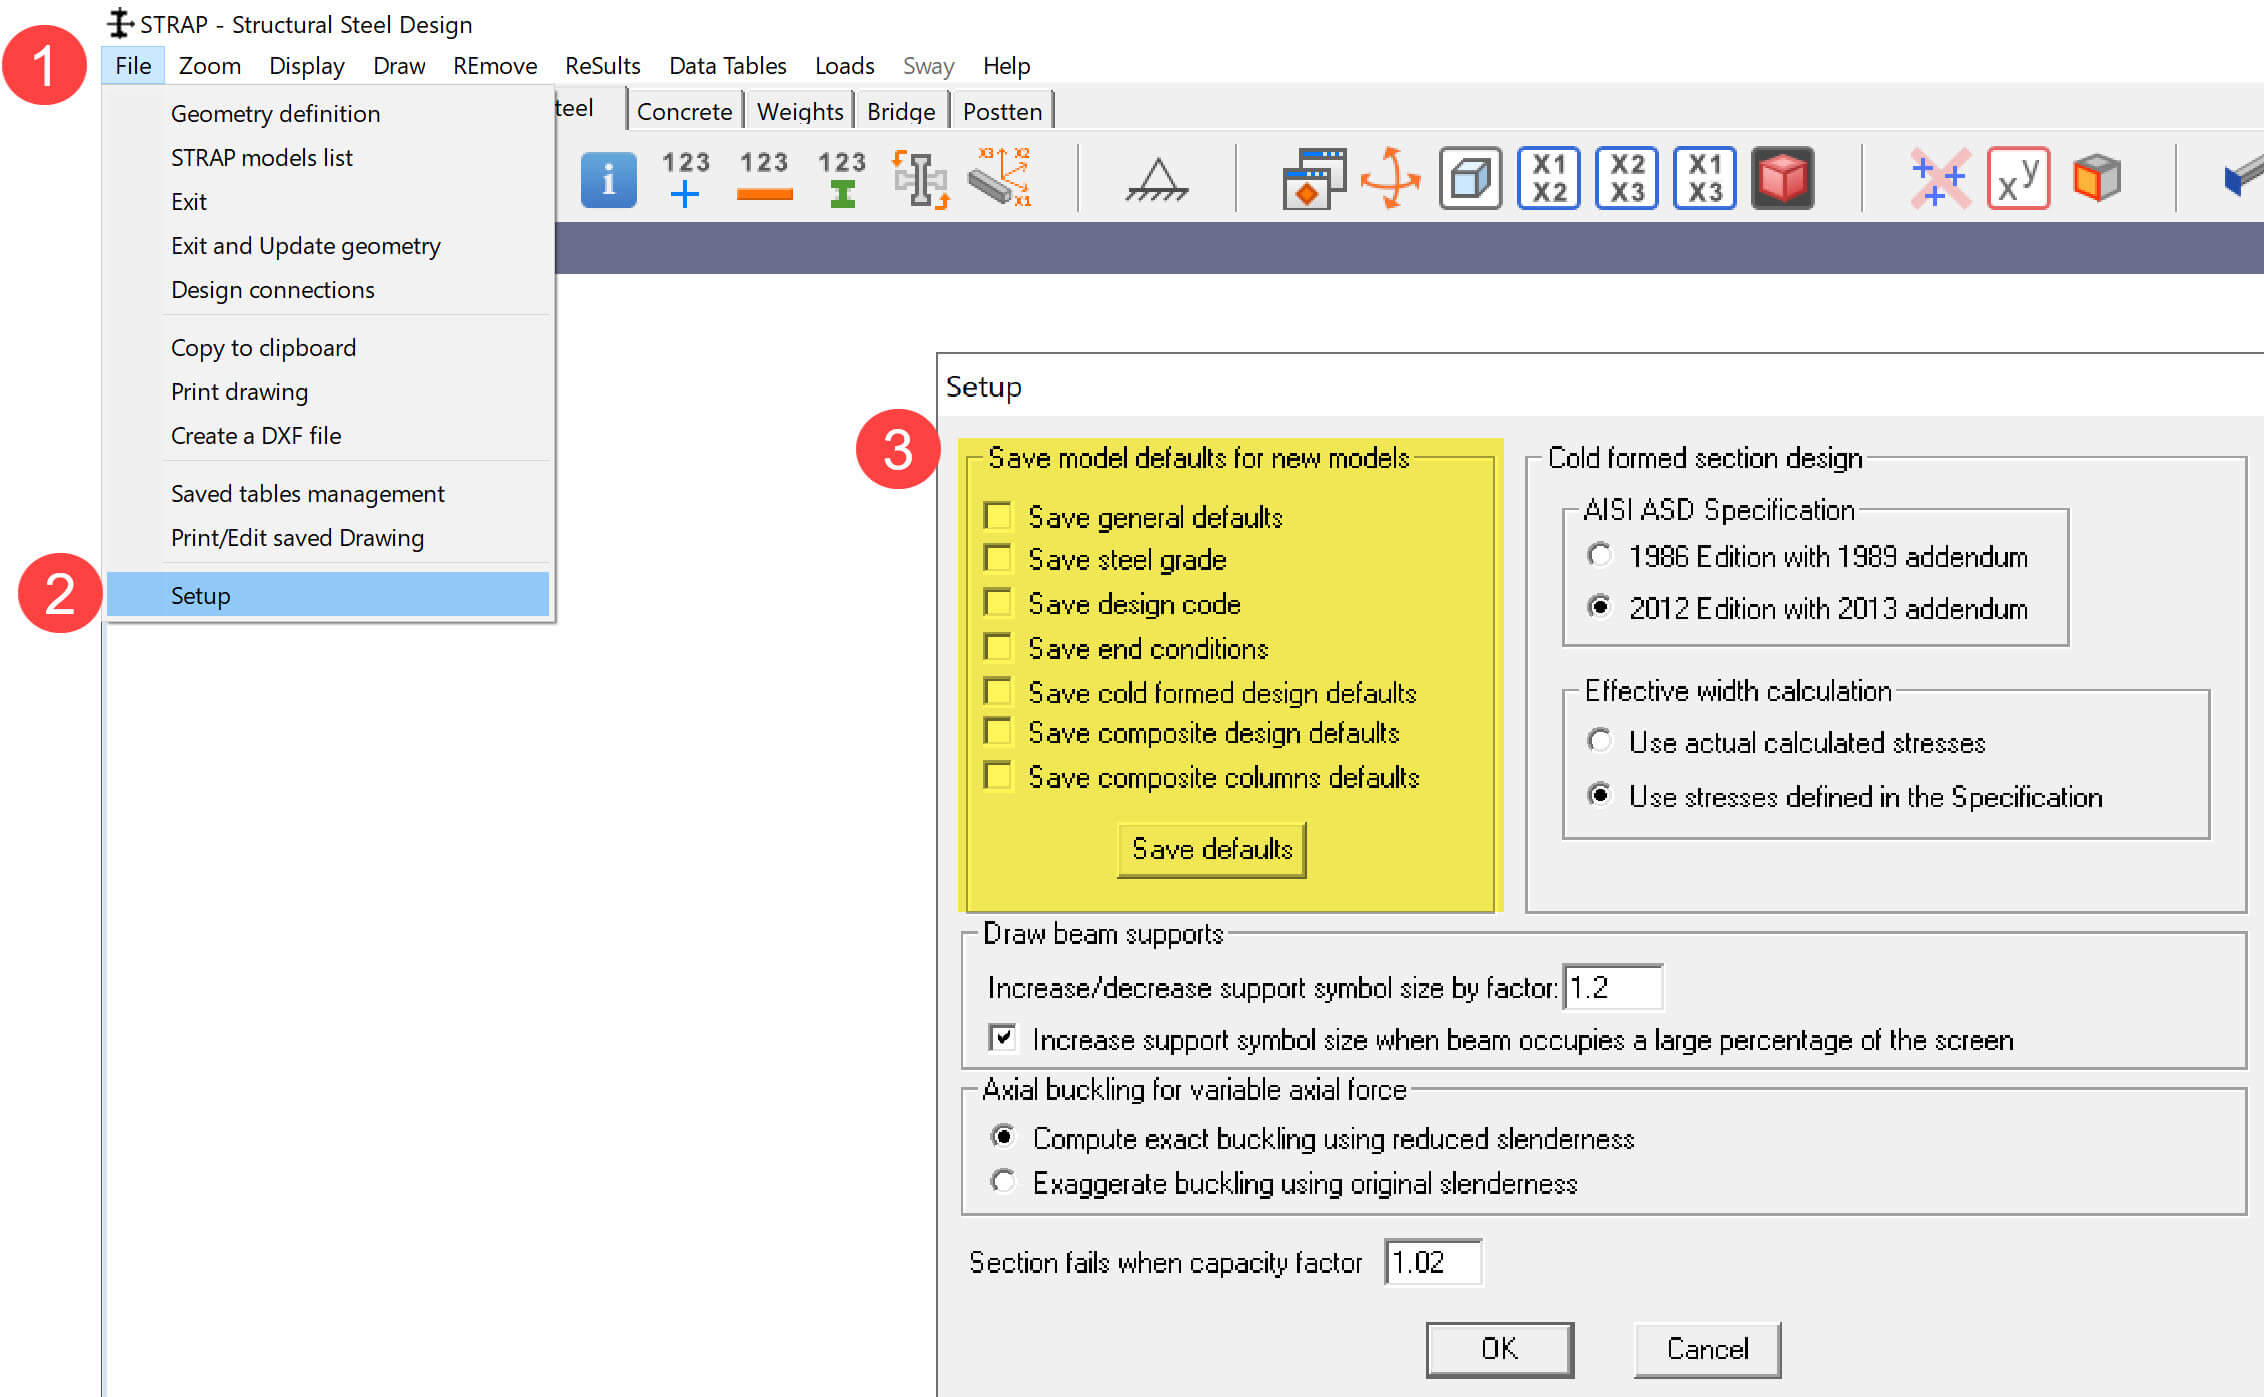
From the Steel tab > File > Setup > Save model defaults for new models
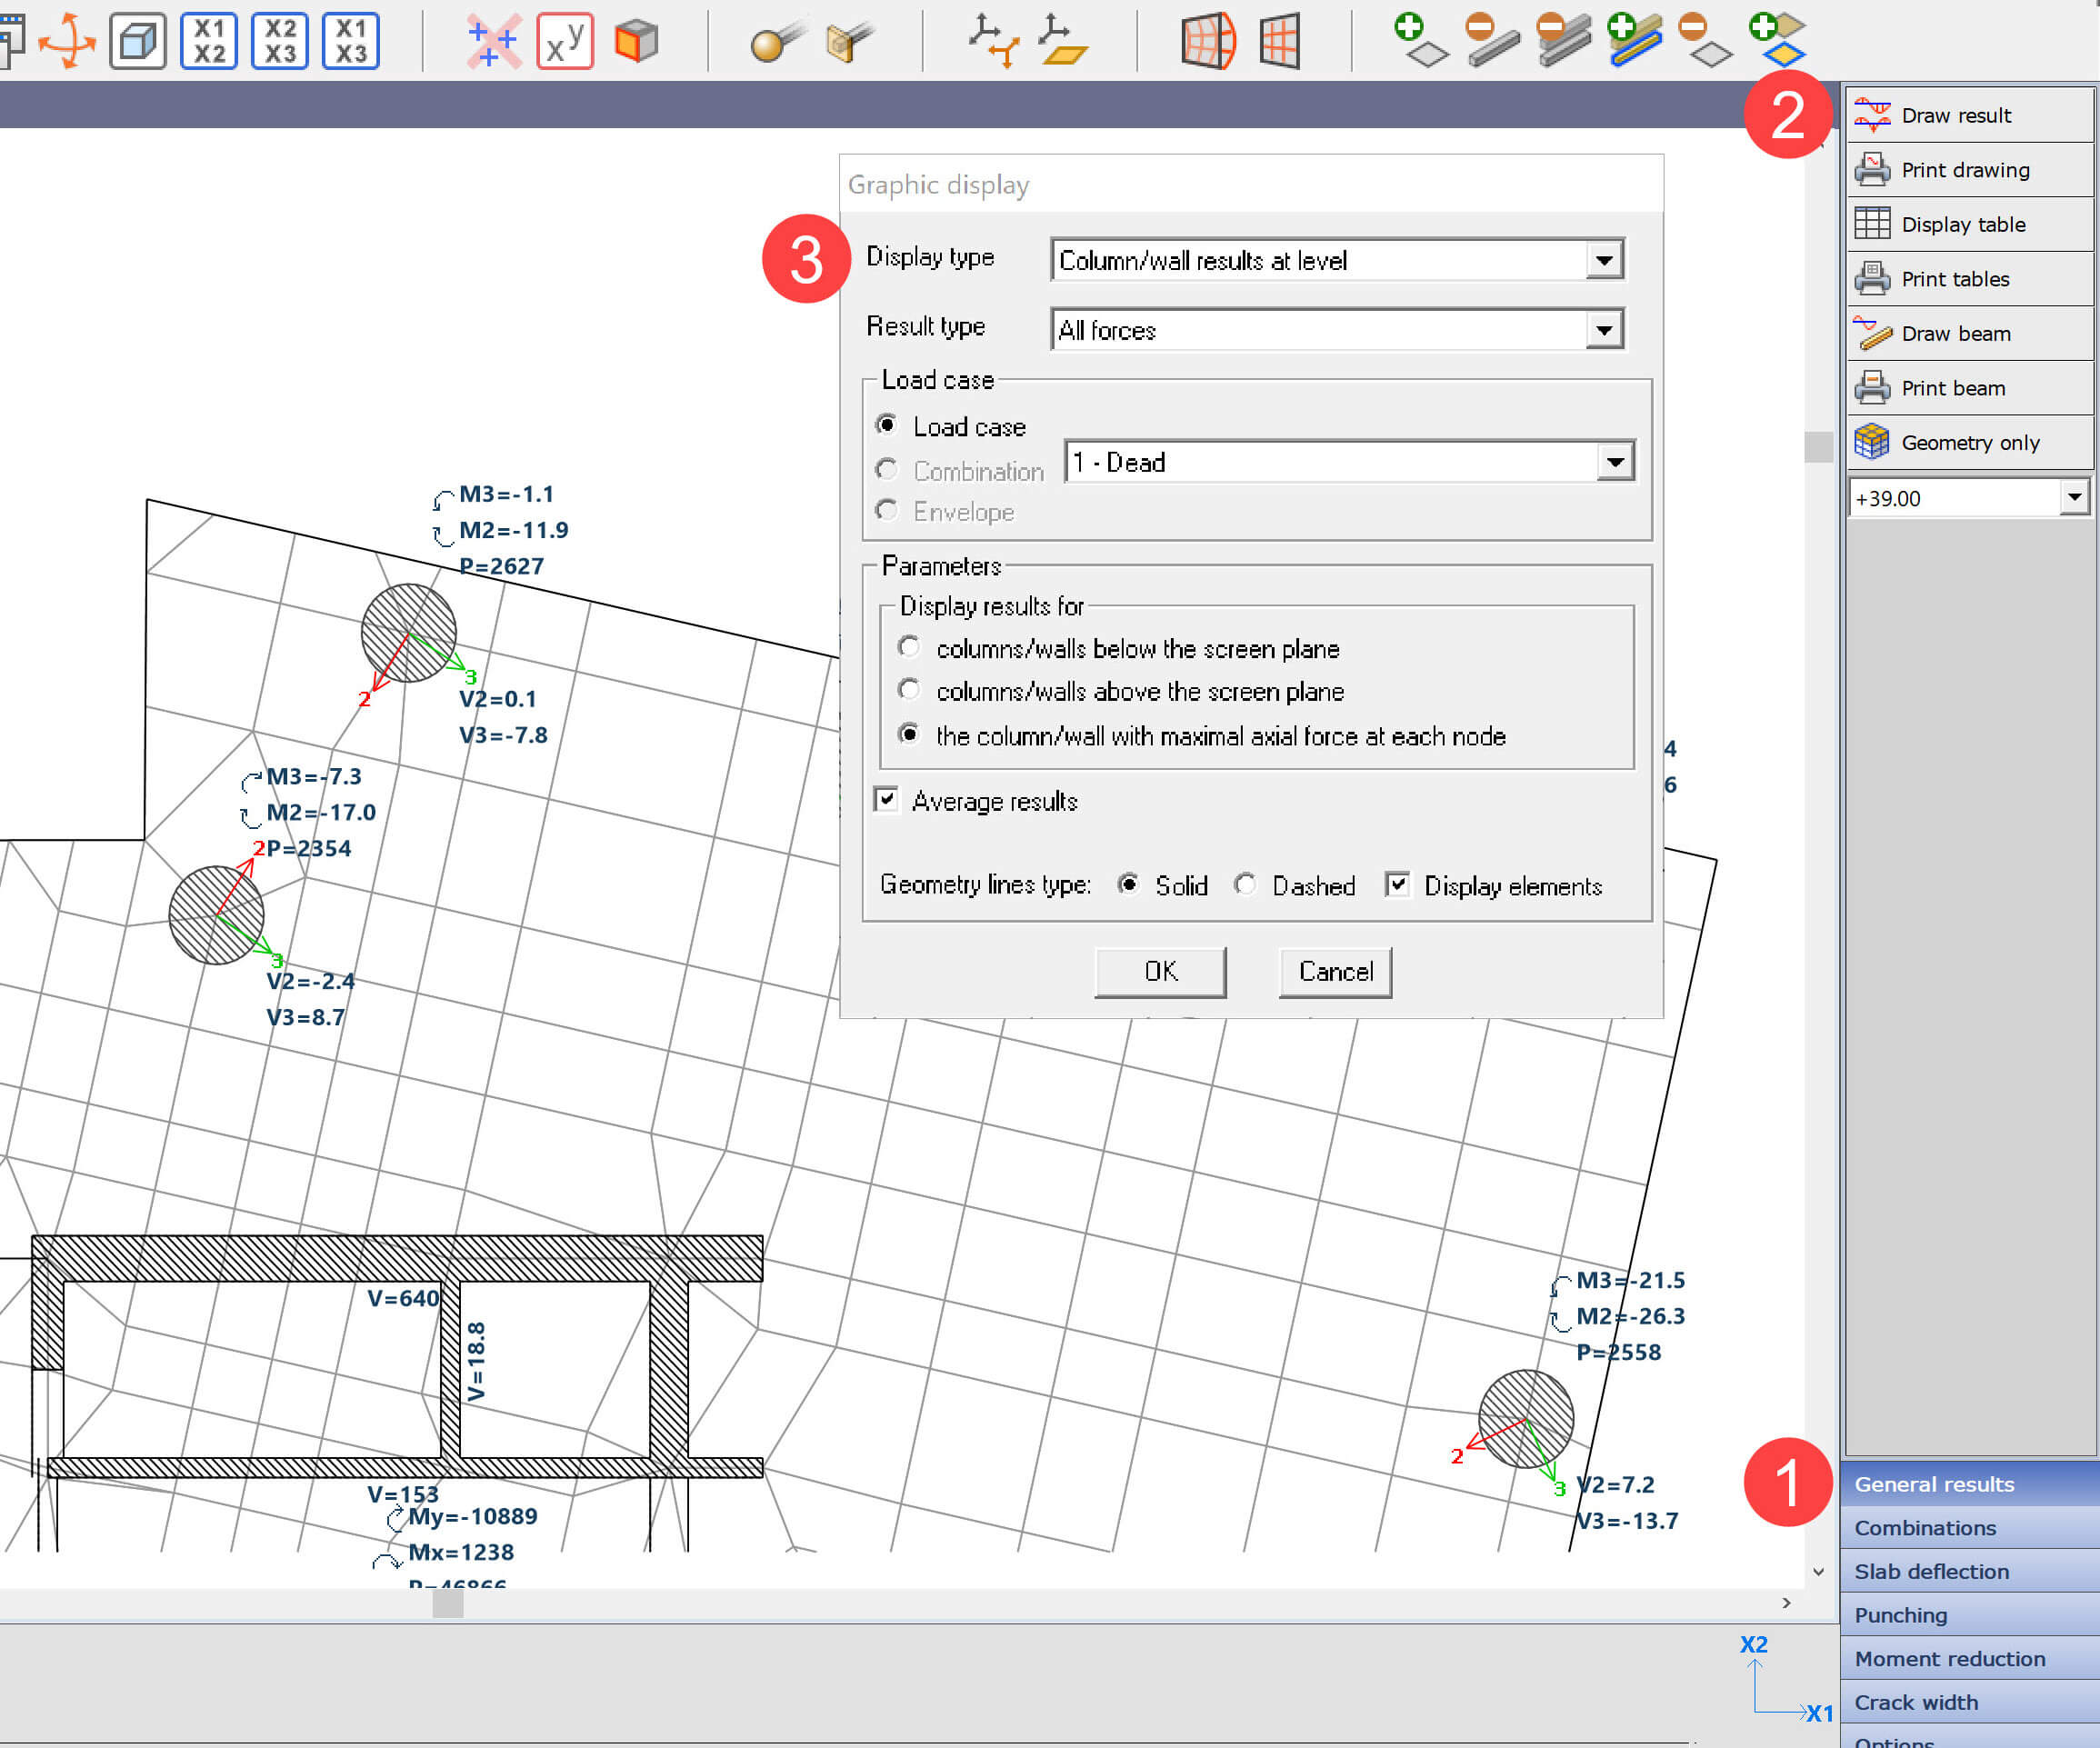
From the results tab > General results > Draw results > under “Display type” select “Column/Wall results at level”.
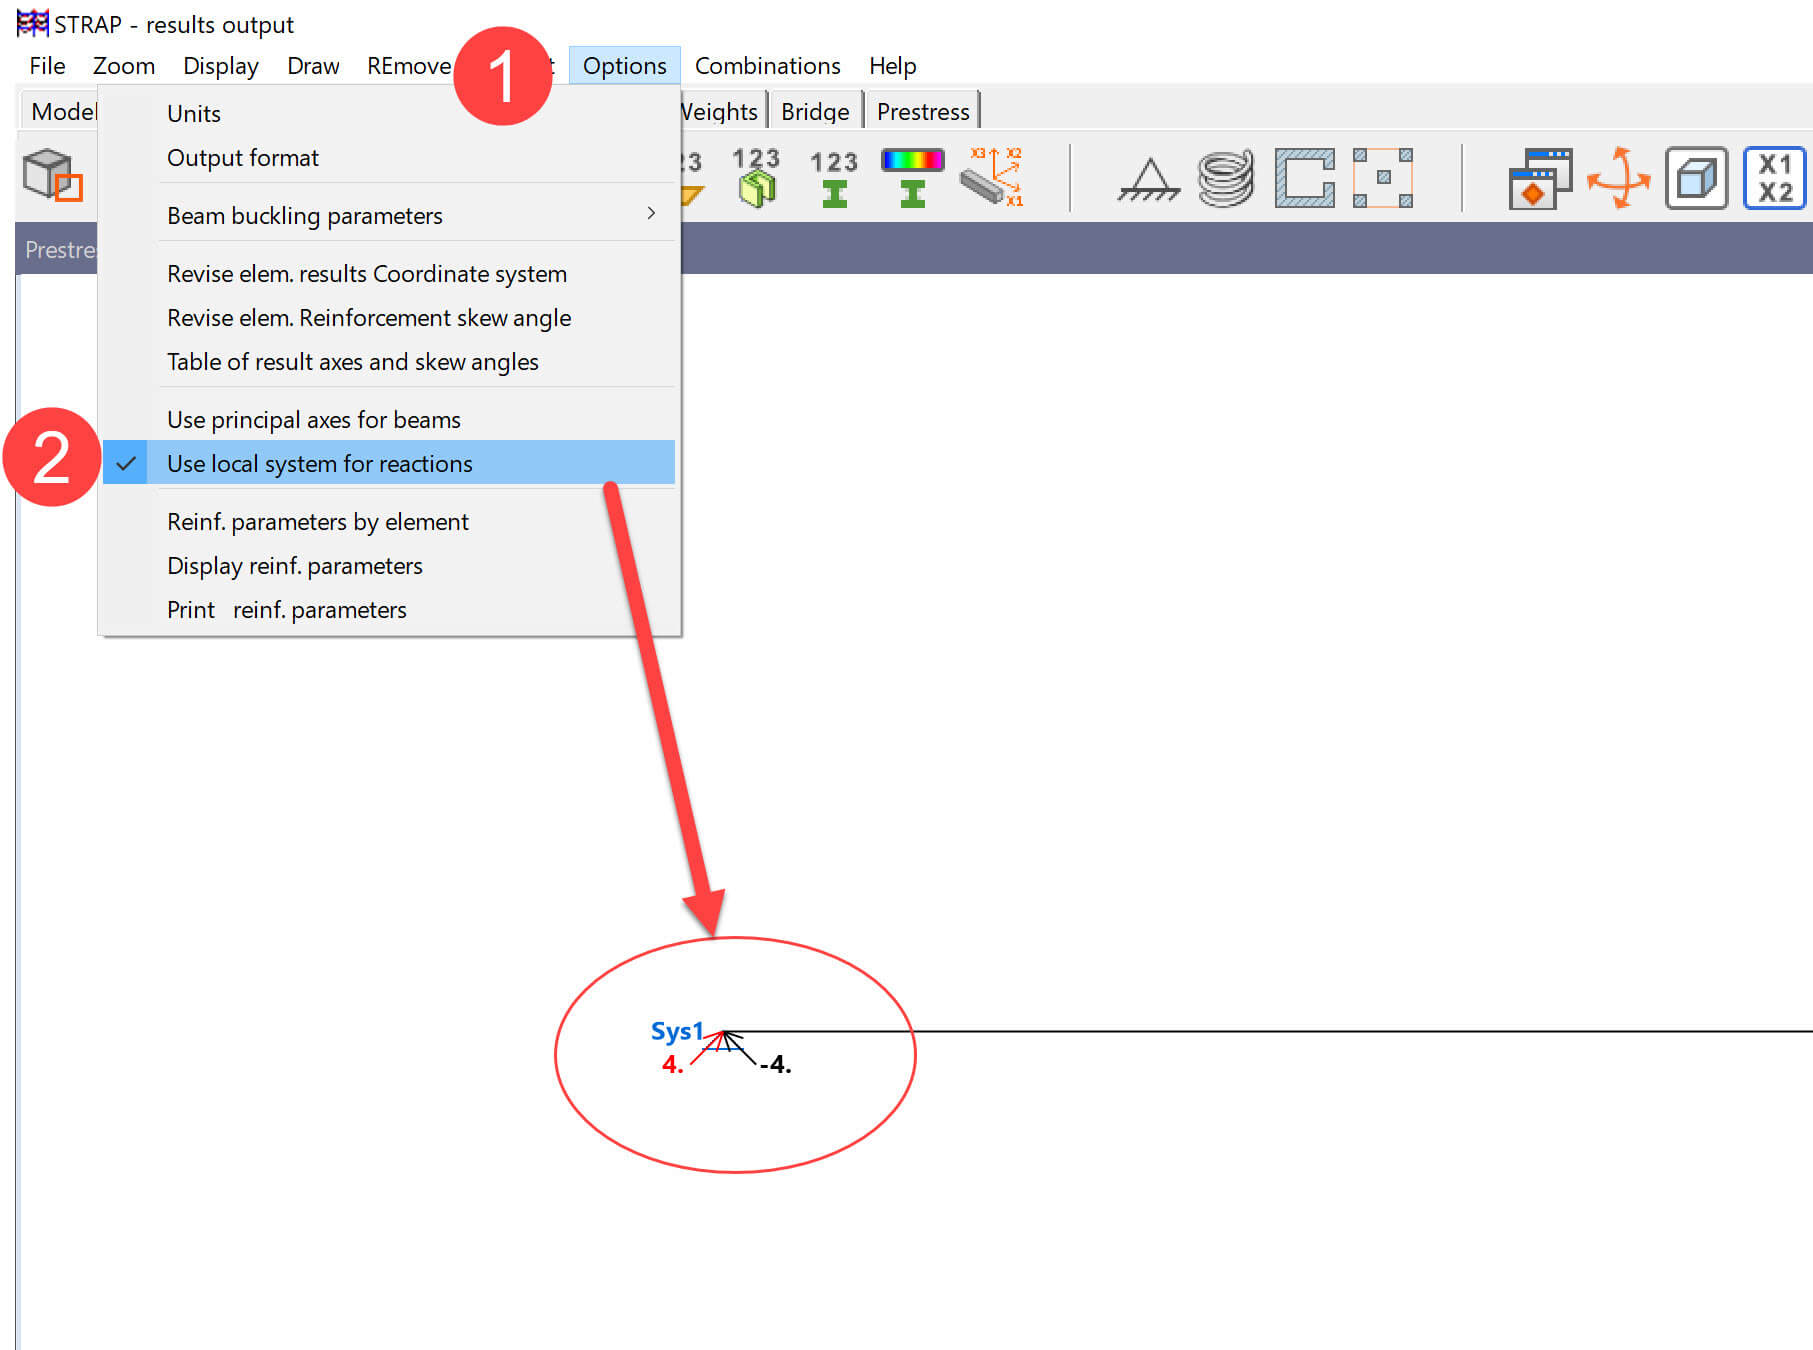
From the Results tab > Options > Use local system for reactions.
From the Results tab > Options > Revise elem results coordinate system > Y towards a selected node.
This feature is useful for a cylindrical defined mesh of elements.

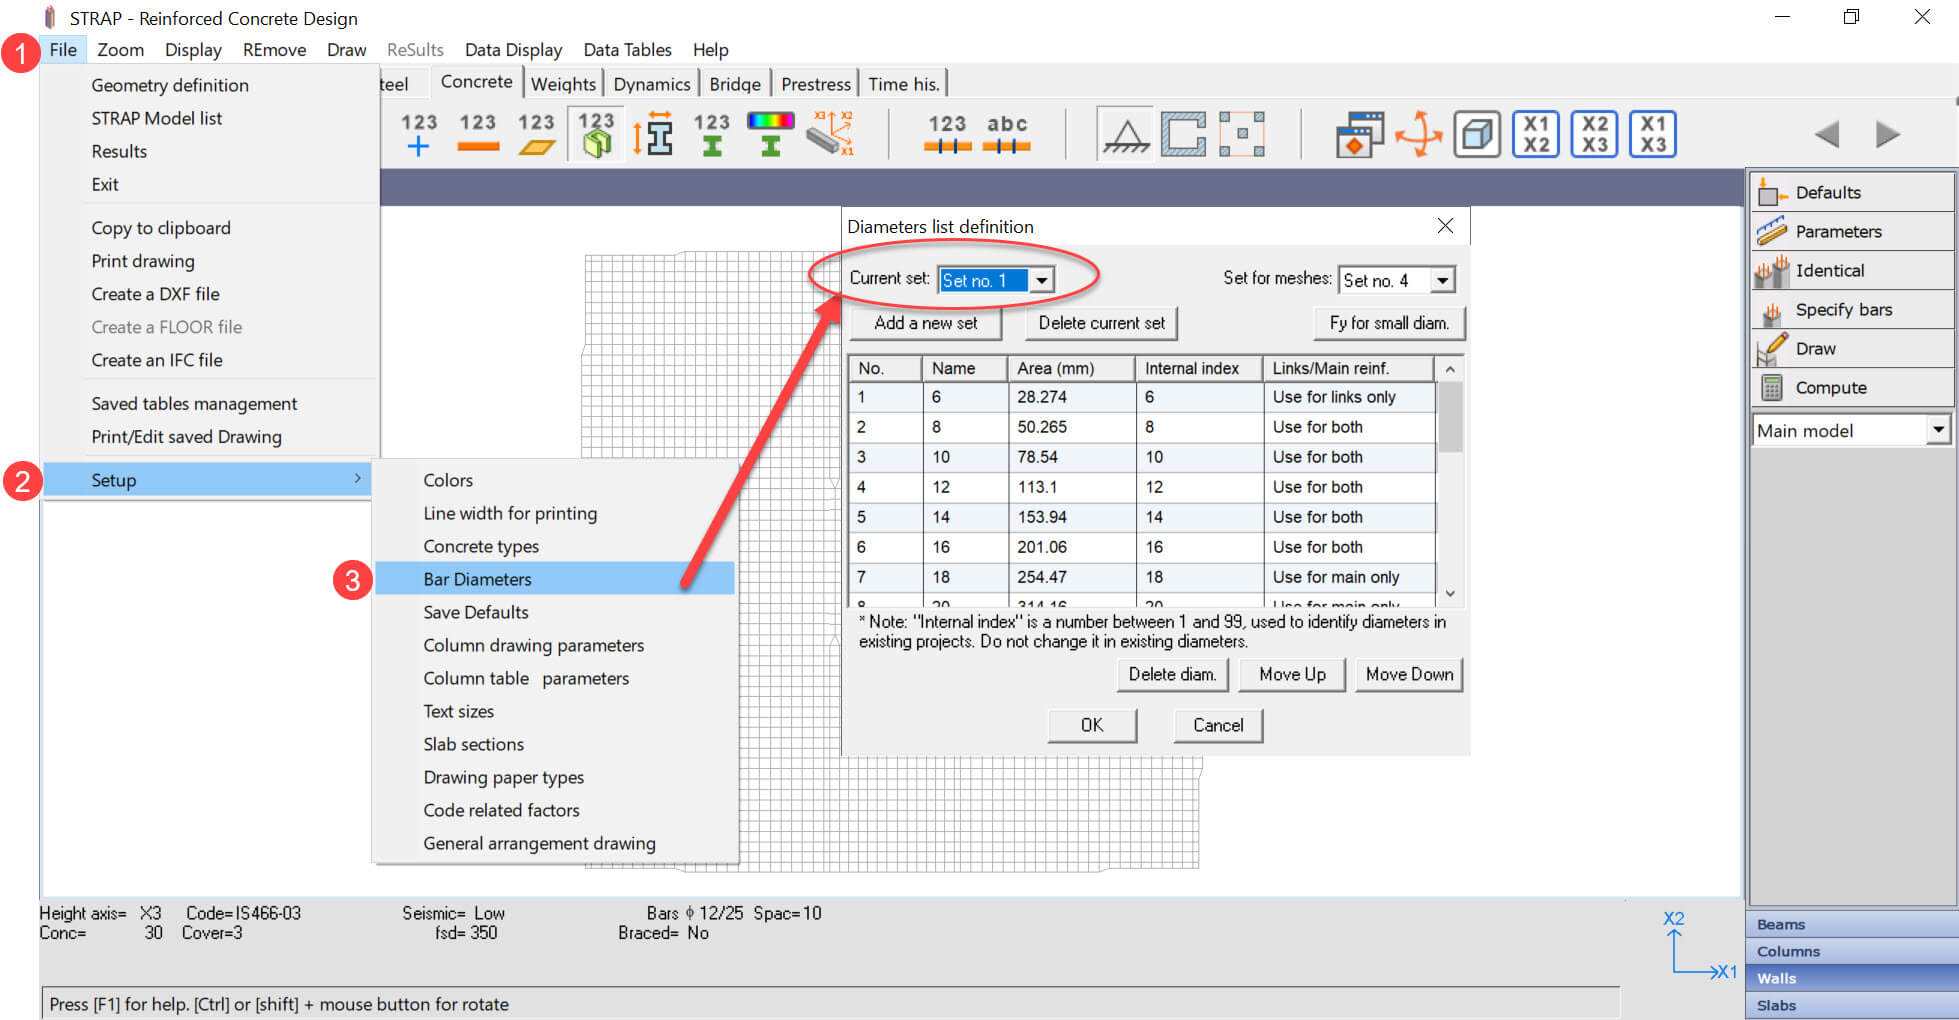
From the Concrete tab File > Setup > Bar diameters.
Revise an existing set or define a new one.
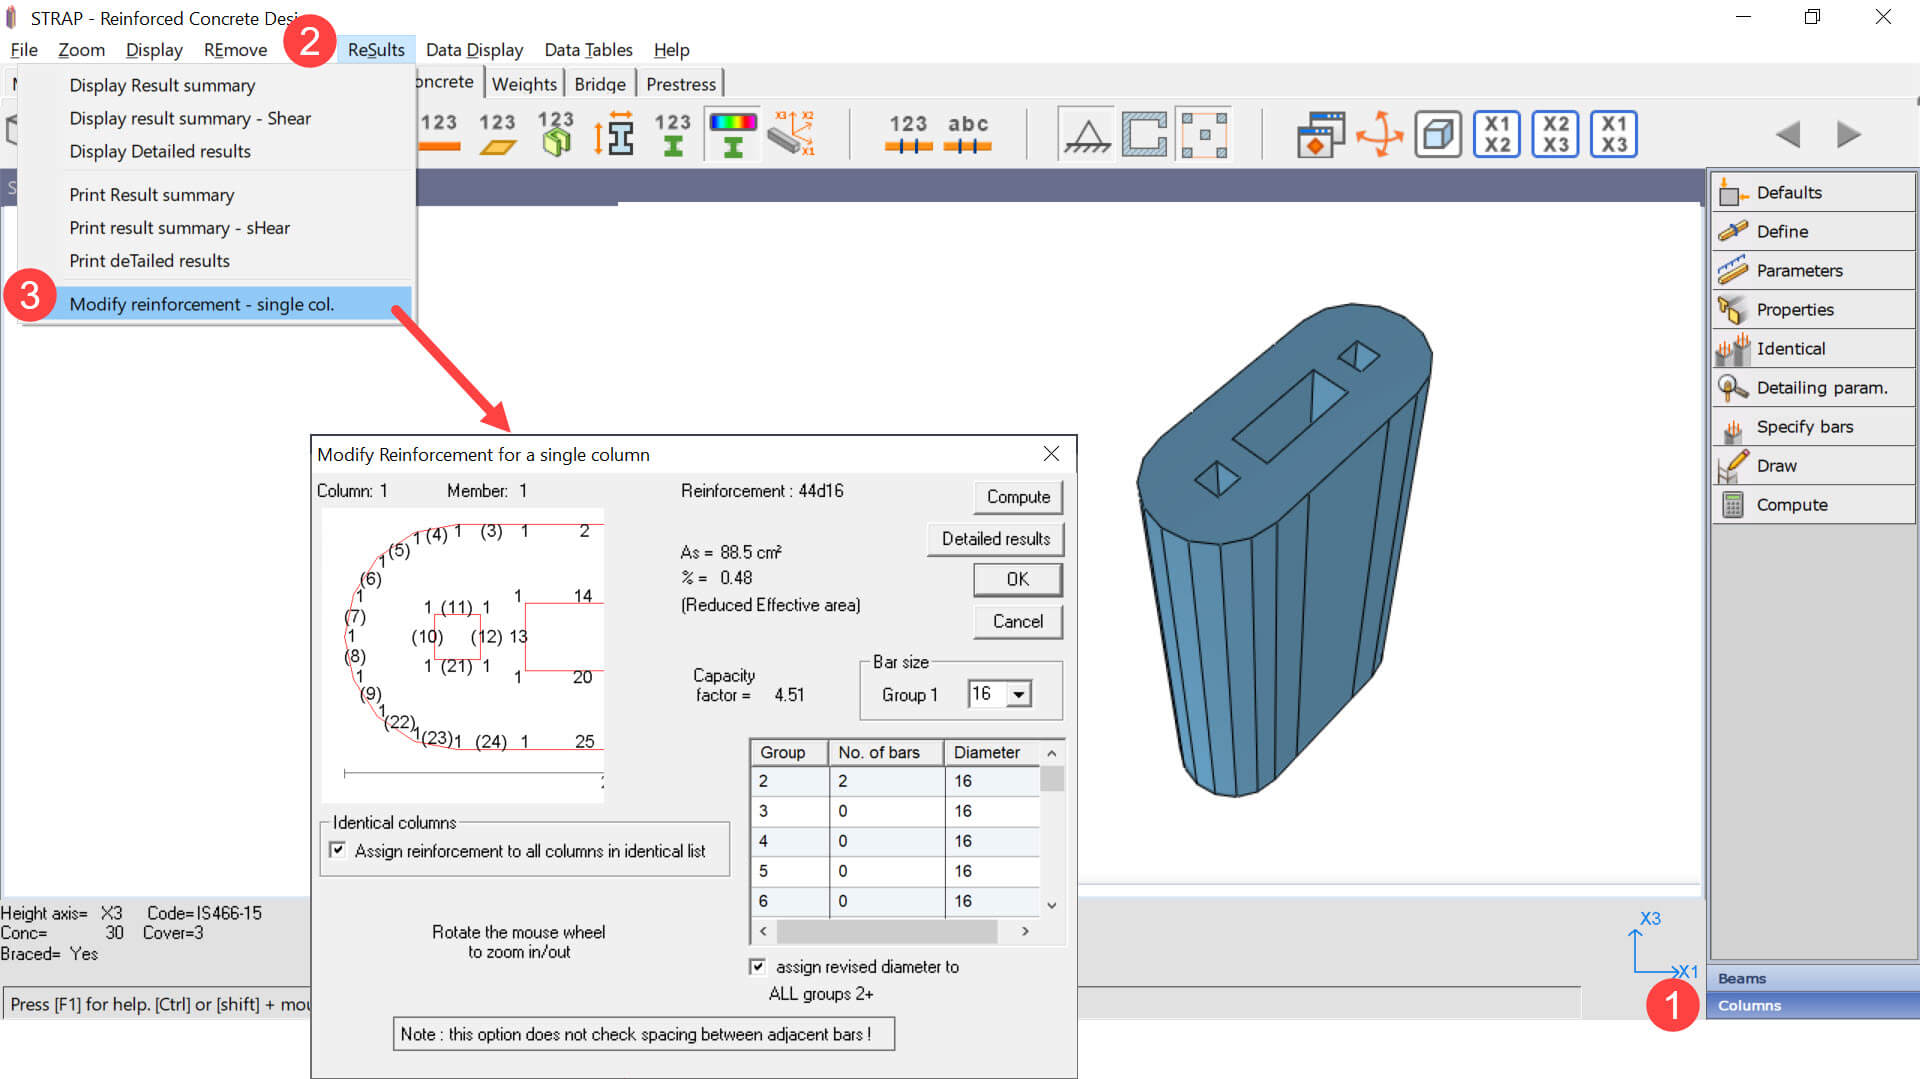
From the Concrete tab, Columns > Results > Modify reinforcement – single column.
Solid sections are defined with Crosec software and usually used for unordinary concrete section shapes.
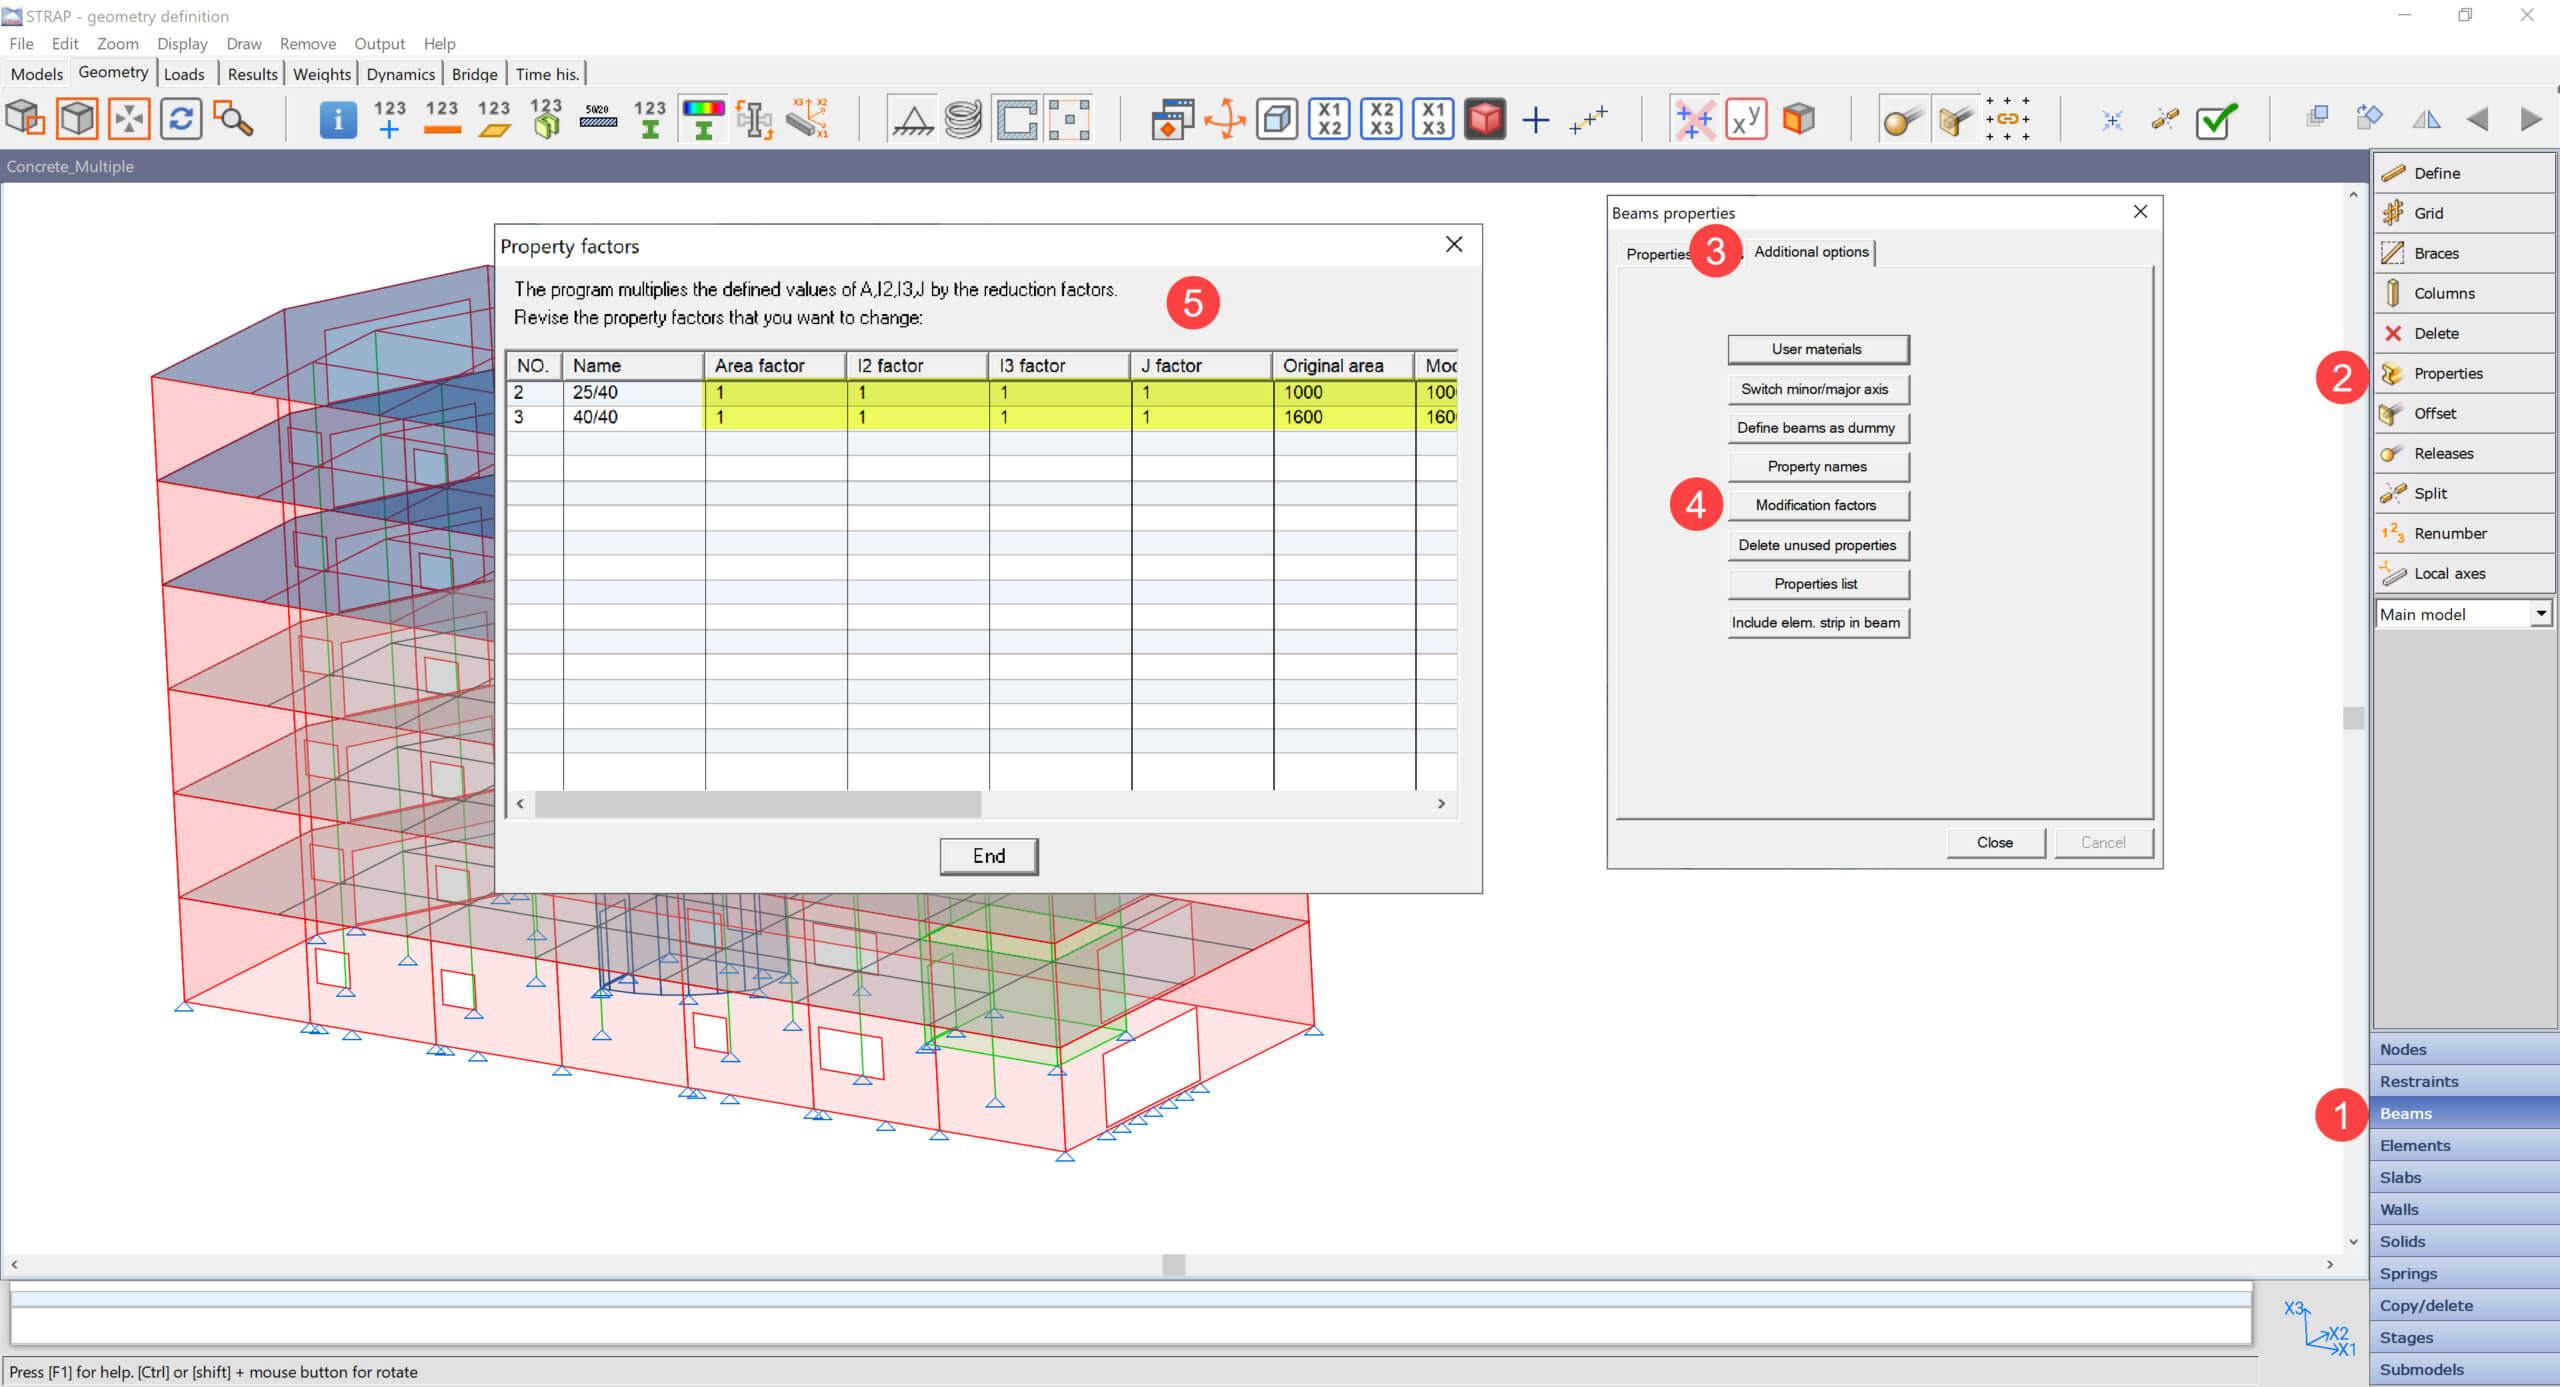
From the Geometry tab, Beams > Properties > Additional options > Modification factors.
This feature allows modification of beam/column section properties such as area, moment of inertia, etc.
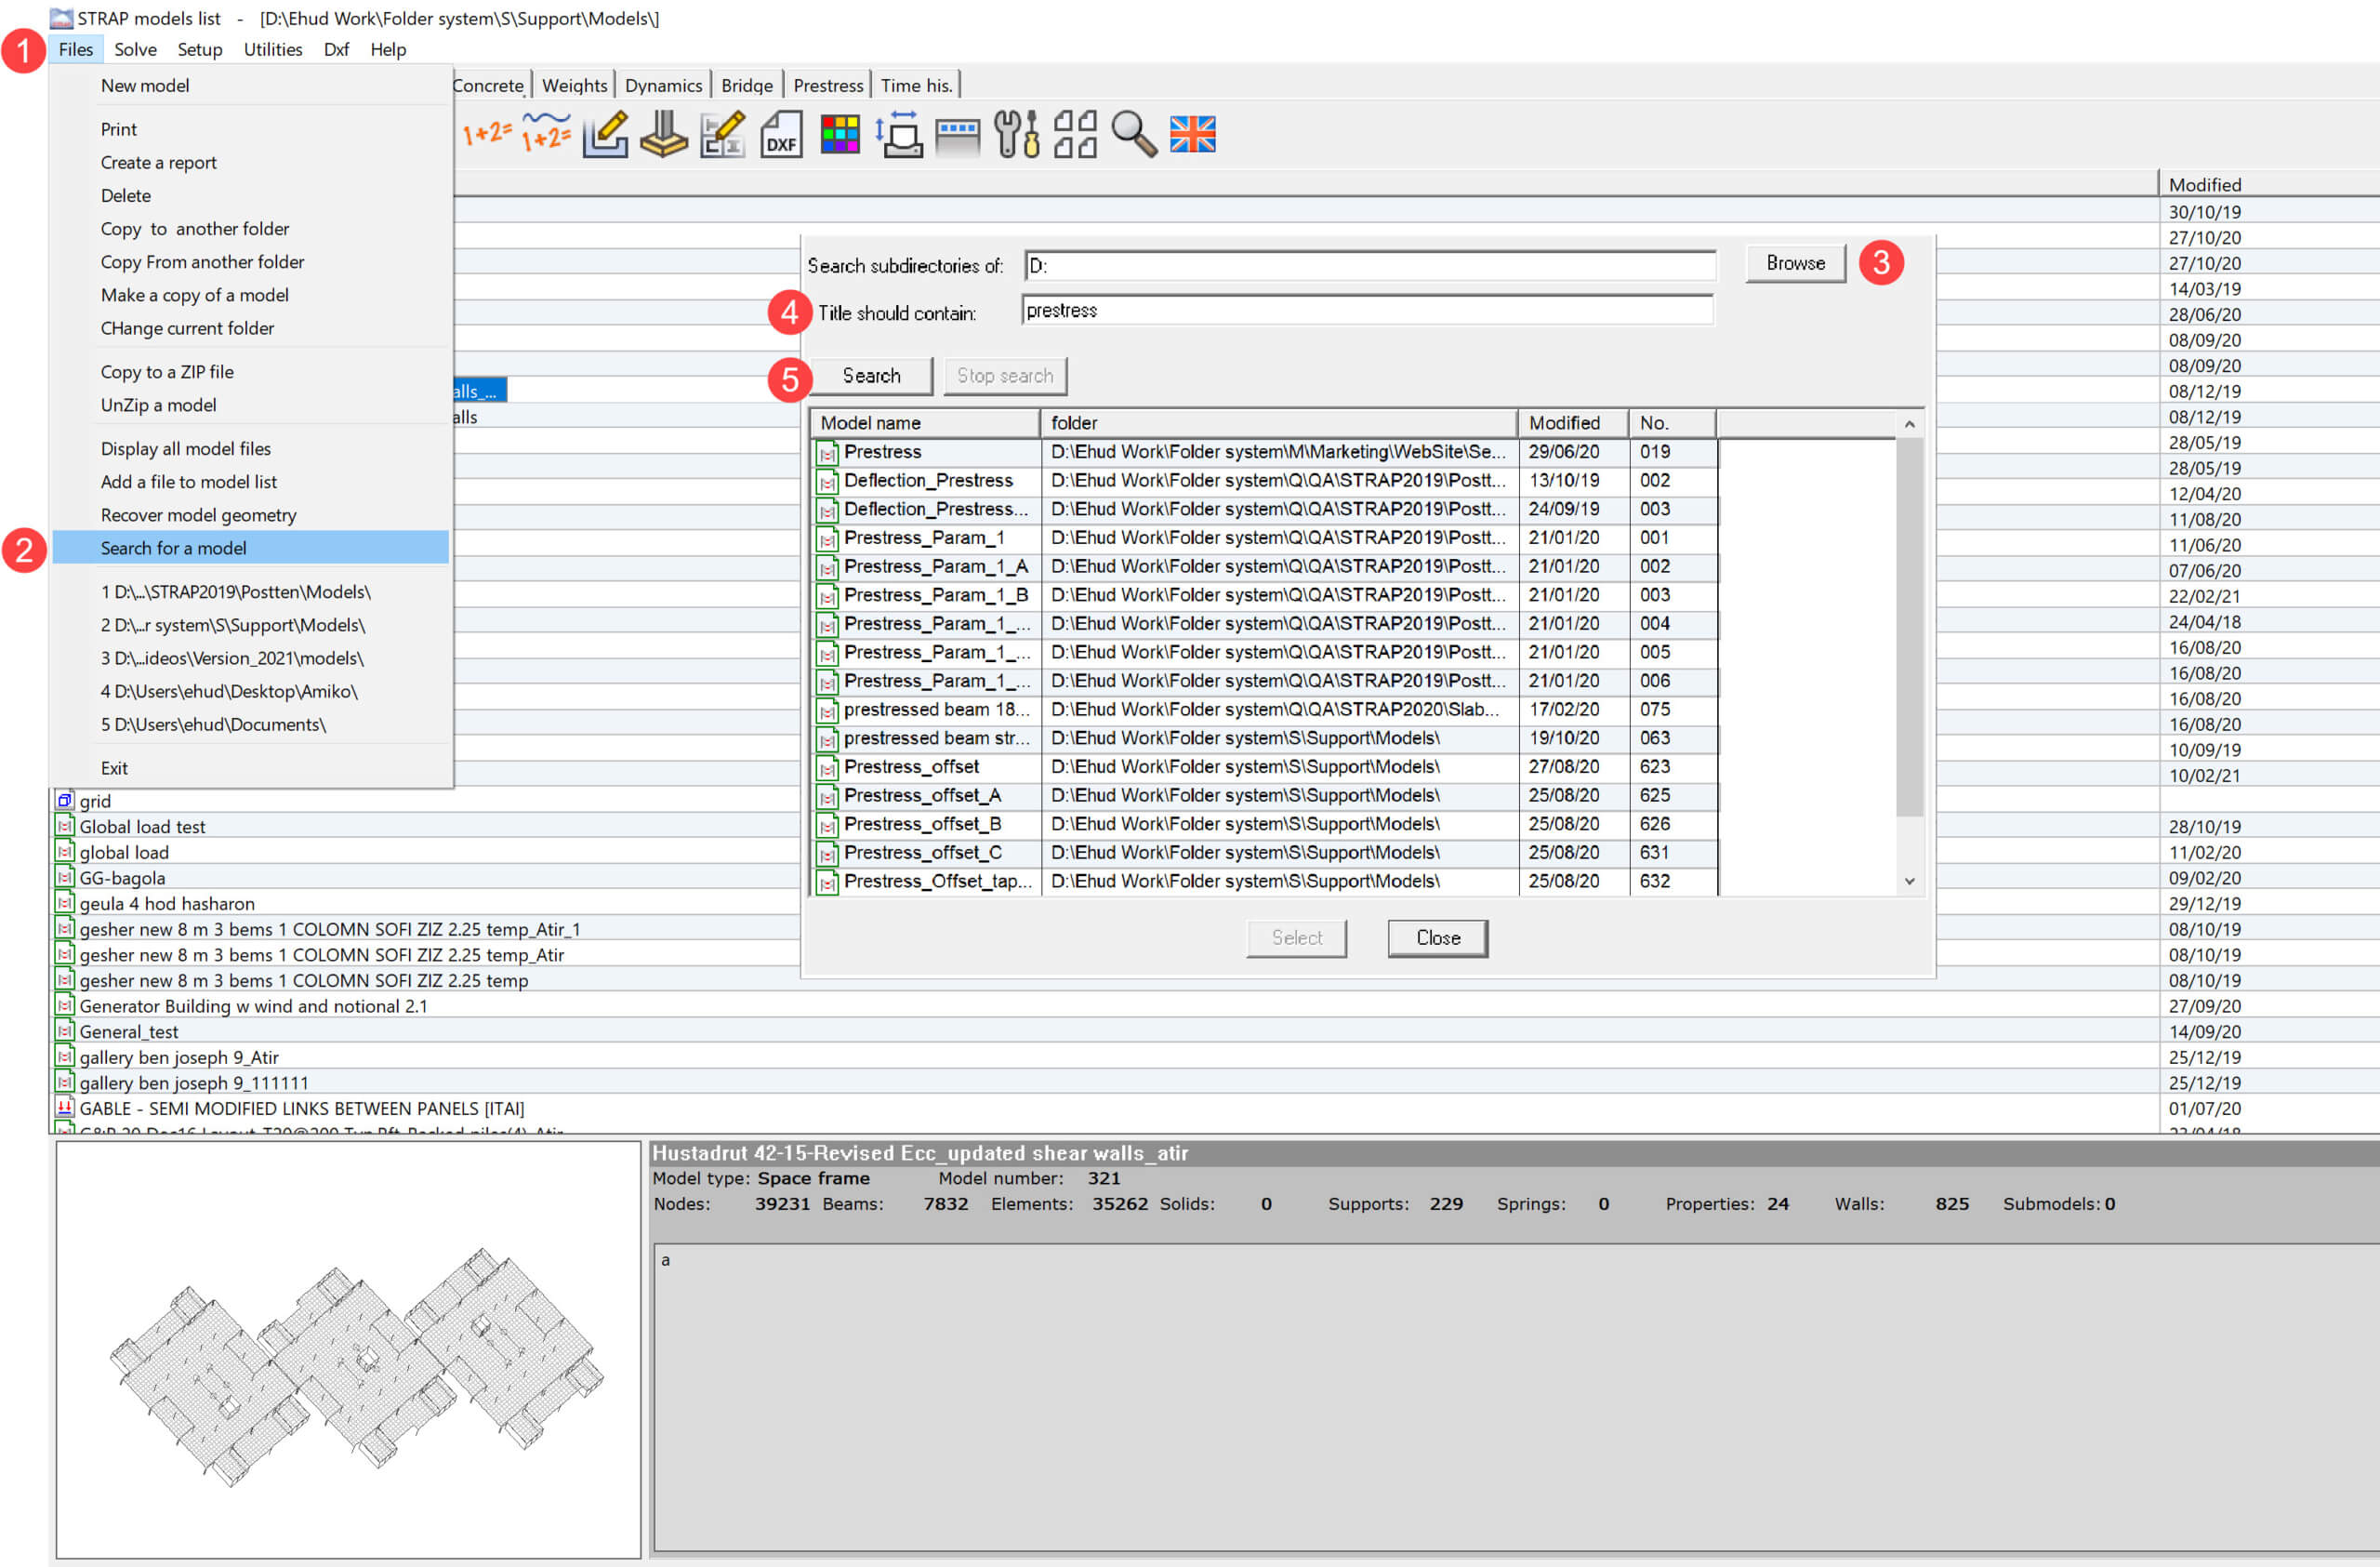
From the Models tab, Files > Search for a model > Select a folder or drive > Insert keyword for search > Click search.
From the Loads tab, Combination > Change combination status.
For the status “Solve as a load case” – STRAP will multiply each load case in combination by the specified factor and combine the load cases to one load case. Usually, this feature is used when a non-linear analysis is being conducted.
For the status “Solve after solution” – STRAP will solve each load case individually. After the solution, The results are multiplied by the specified factor, and the results of each load case in the combination are combined to a single result.

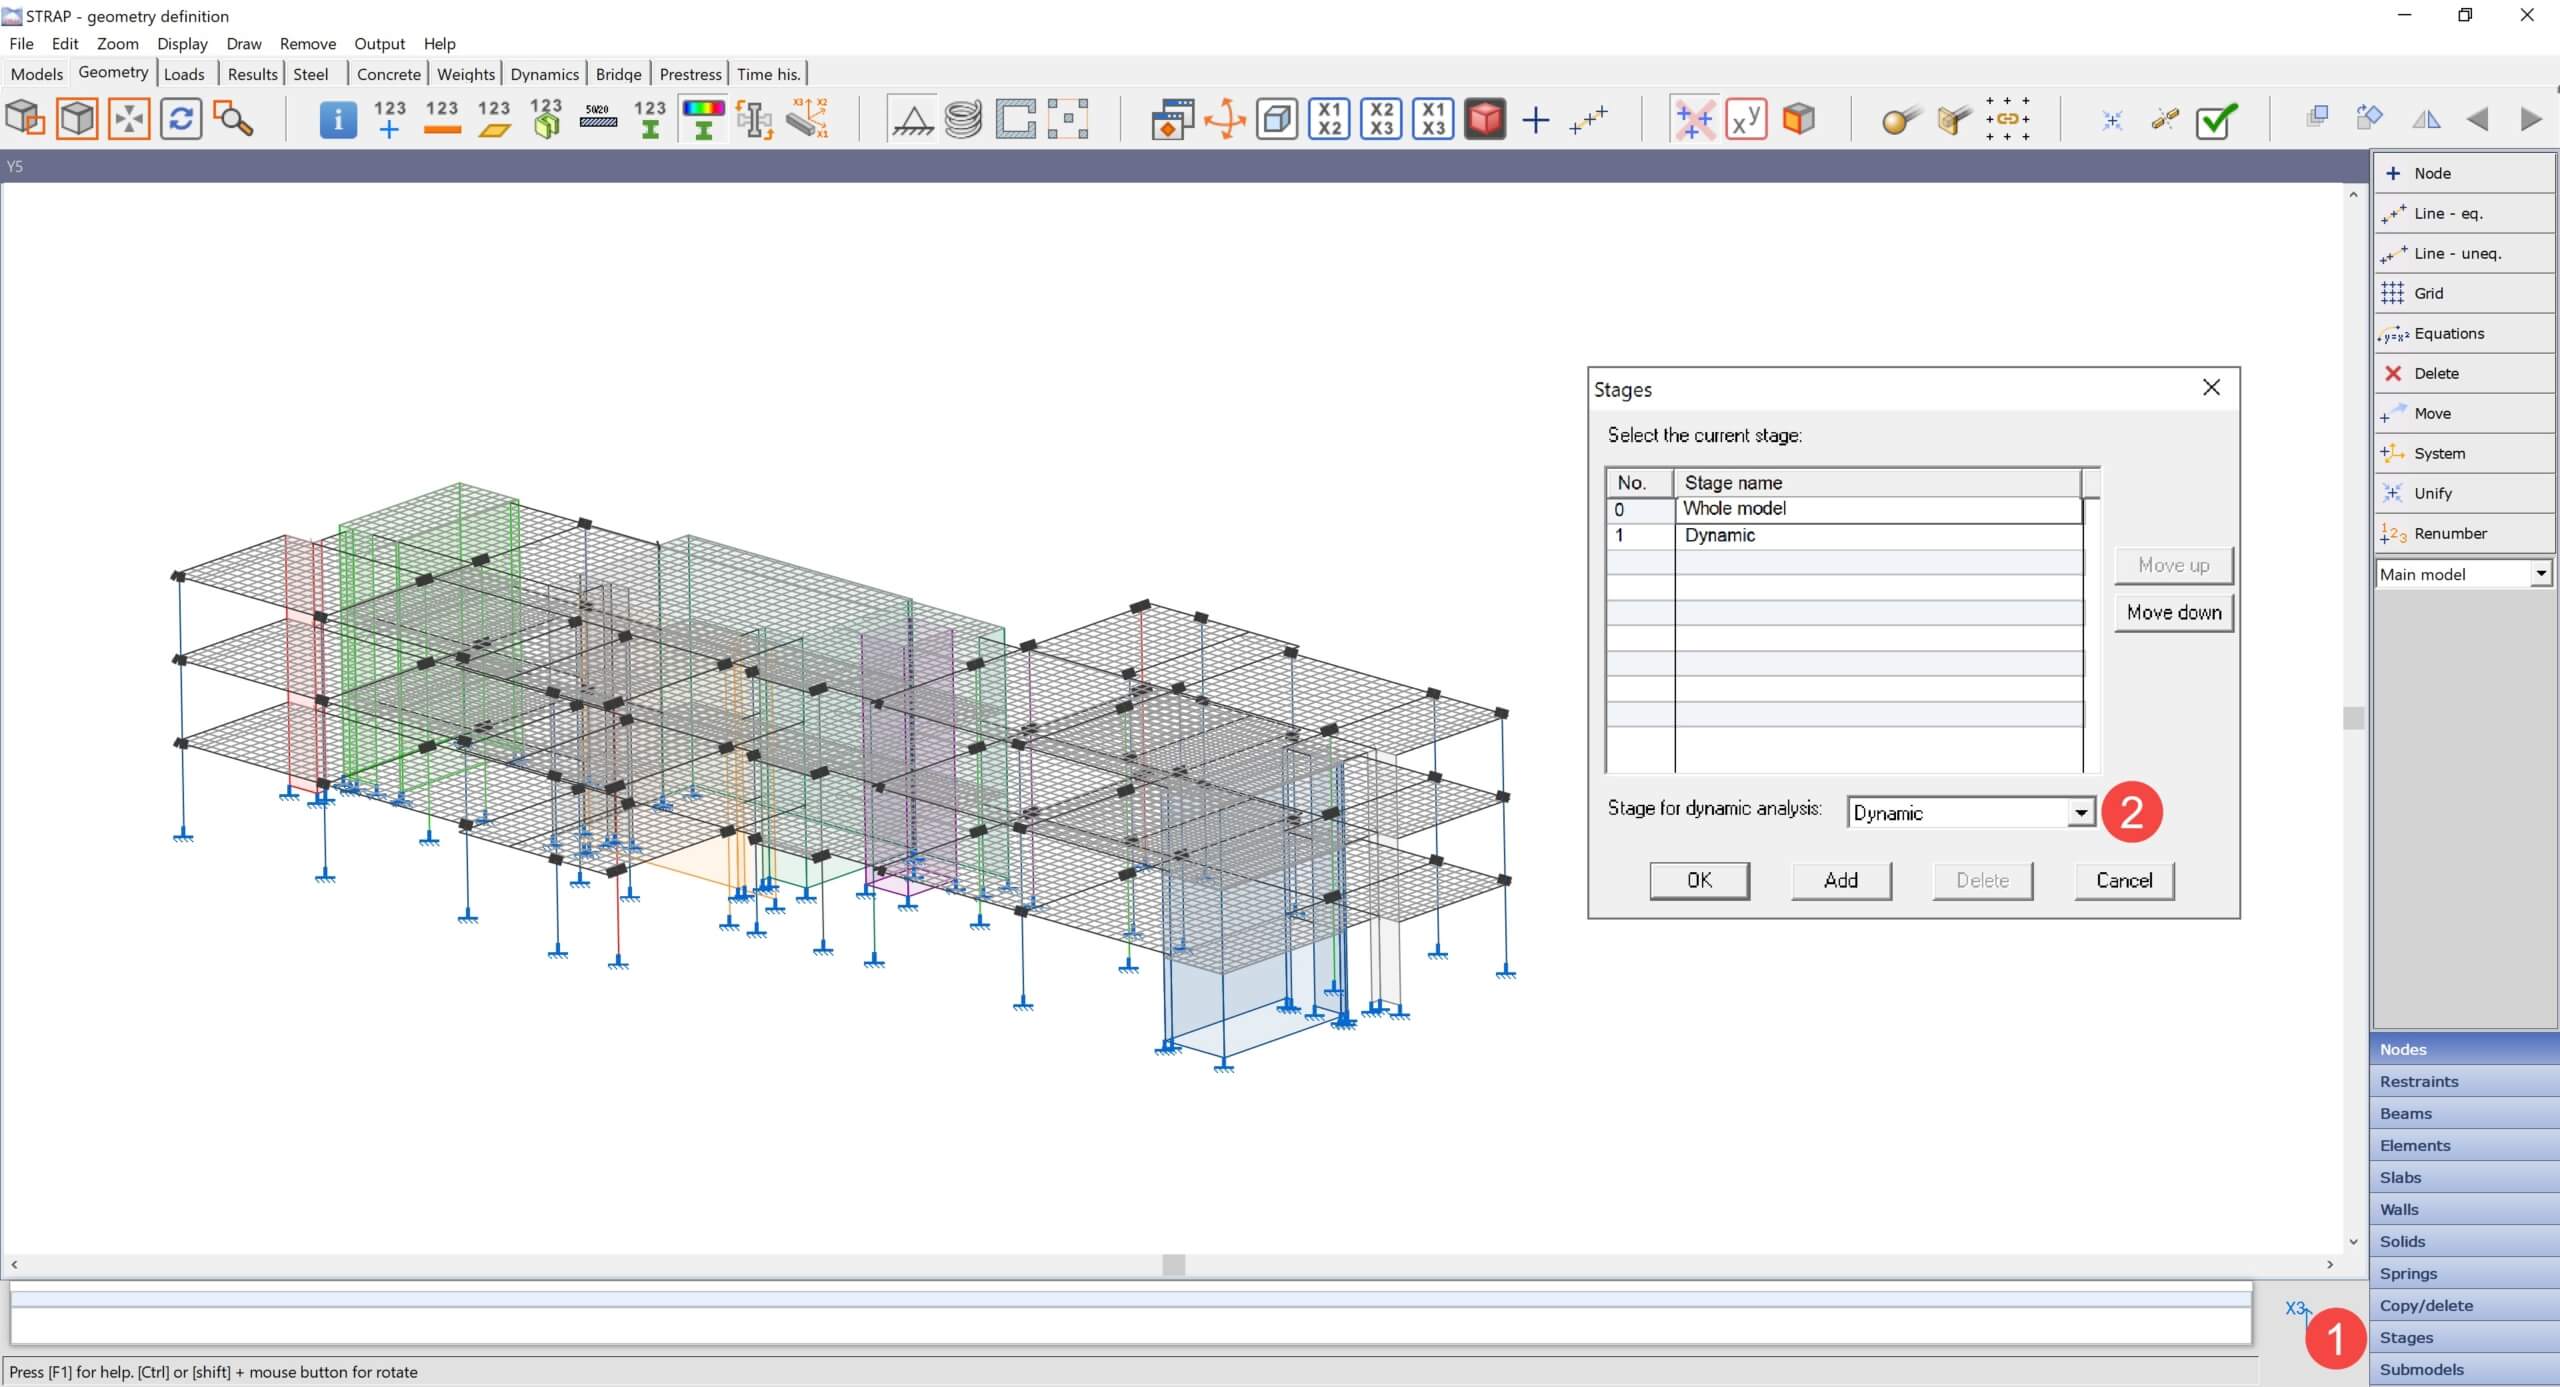
From the Geometry tab, Stages > Stage for dynamic analysis.
This feature allows users to use a structural scheme for static loads and another different scheme for dynamic analysis by selecting any defined stage for dynamic analysis.
When defining a construction stage, modifications such as deactivating elements, revising end conditions, removing submodels, etc. are available.
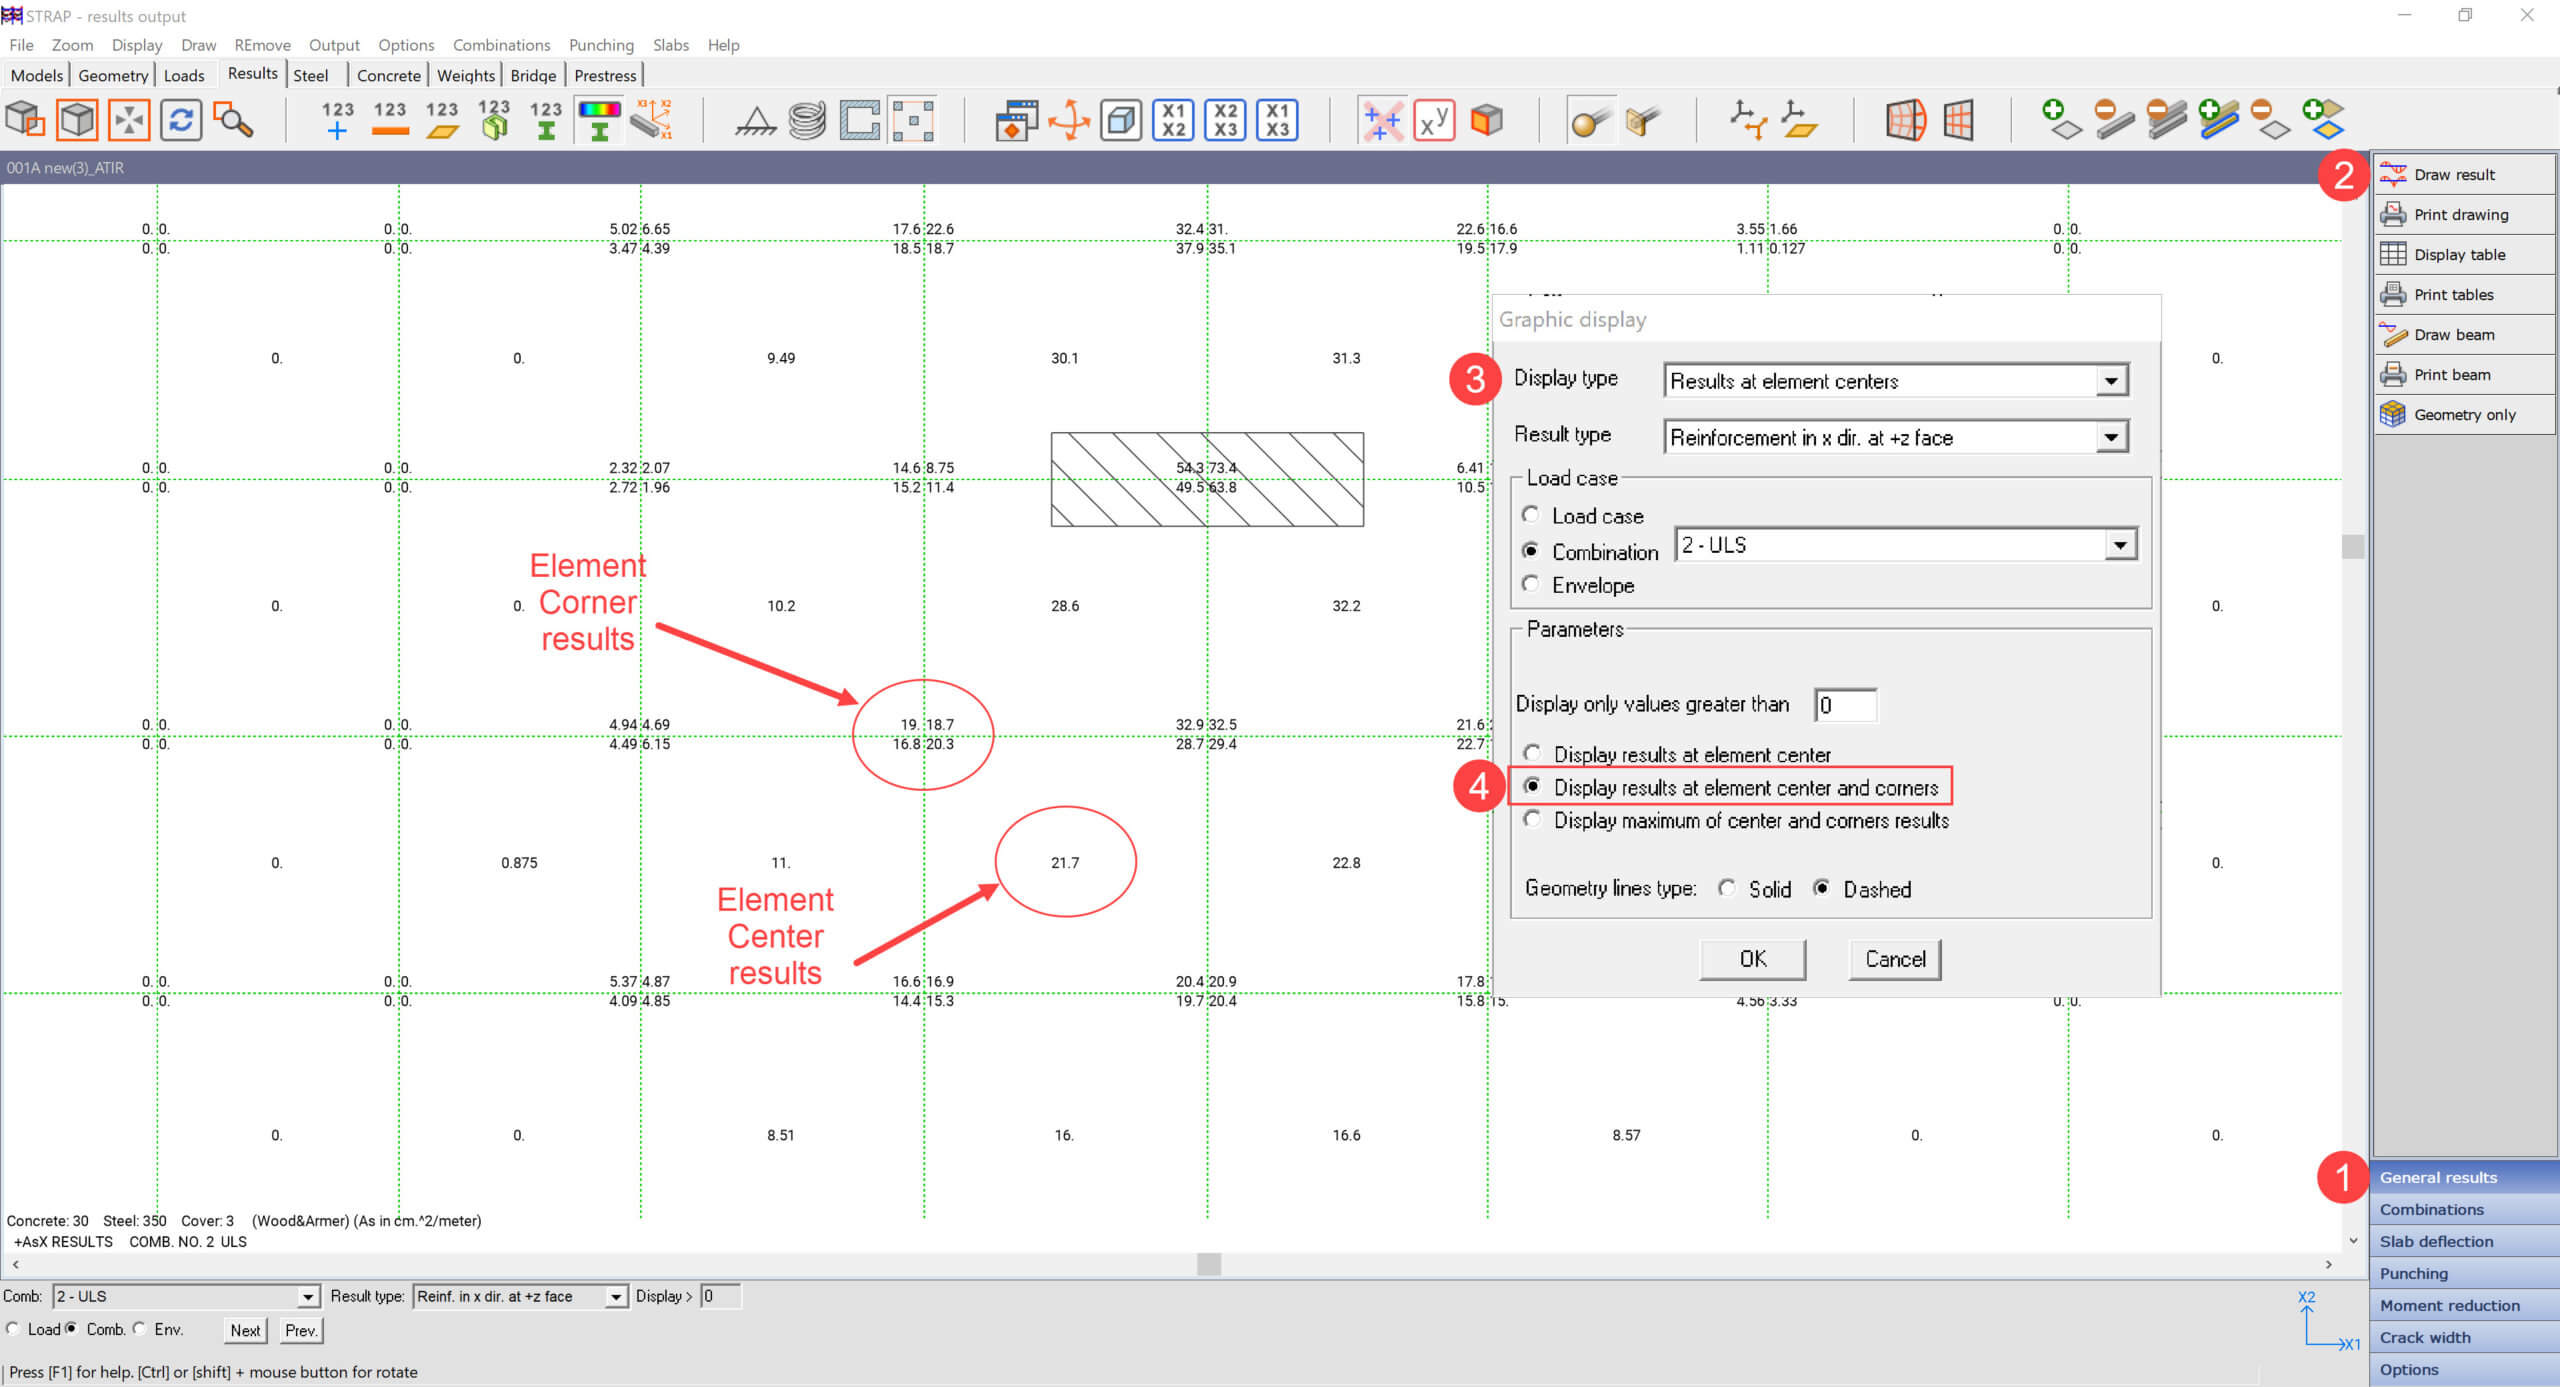
From the Results tab, General results > Draw results > Display type – “Results at elements centers” > Under parameters “Display results at element centers and corners”
This feature allows a more refine results interpretation when needed.
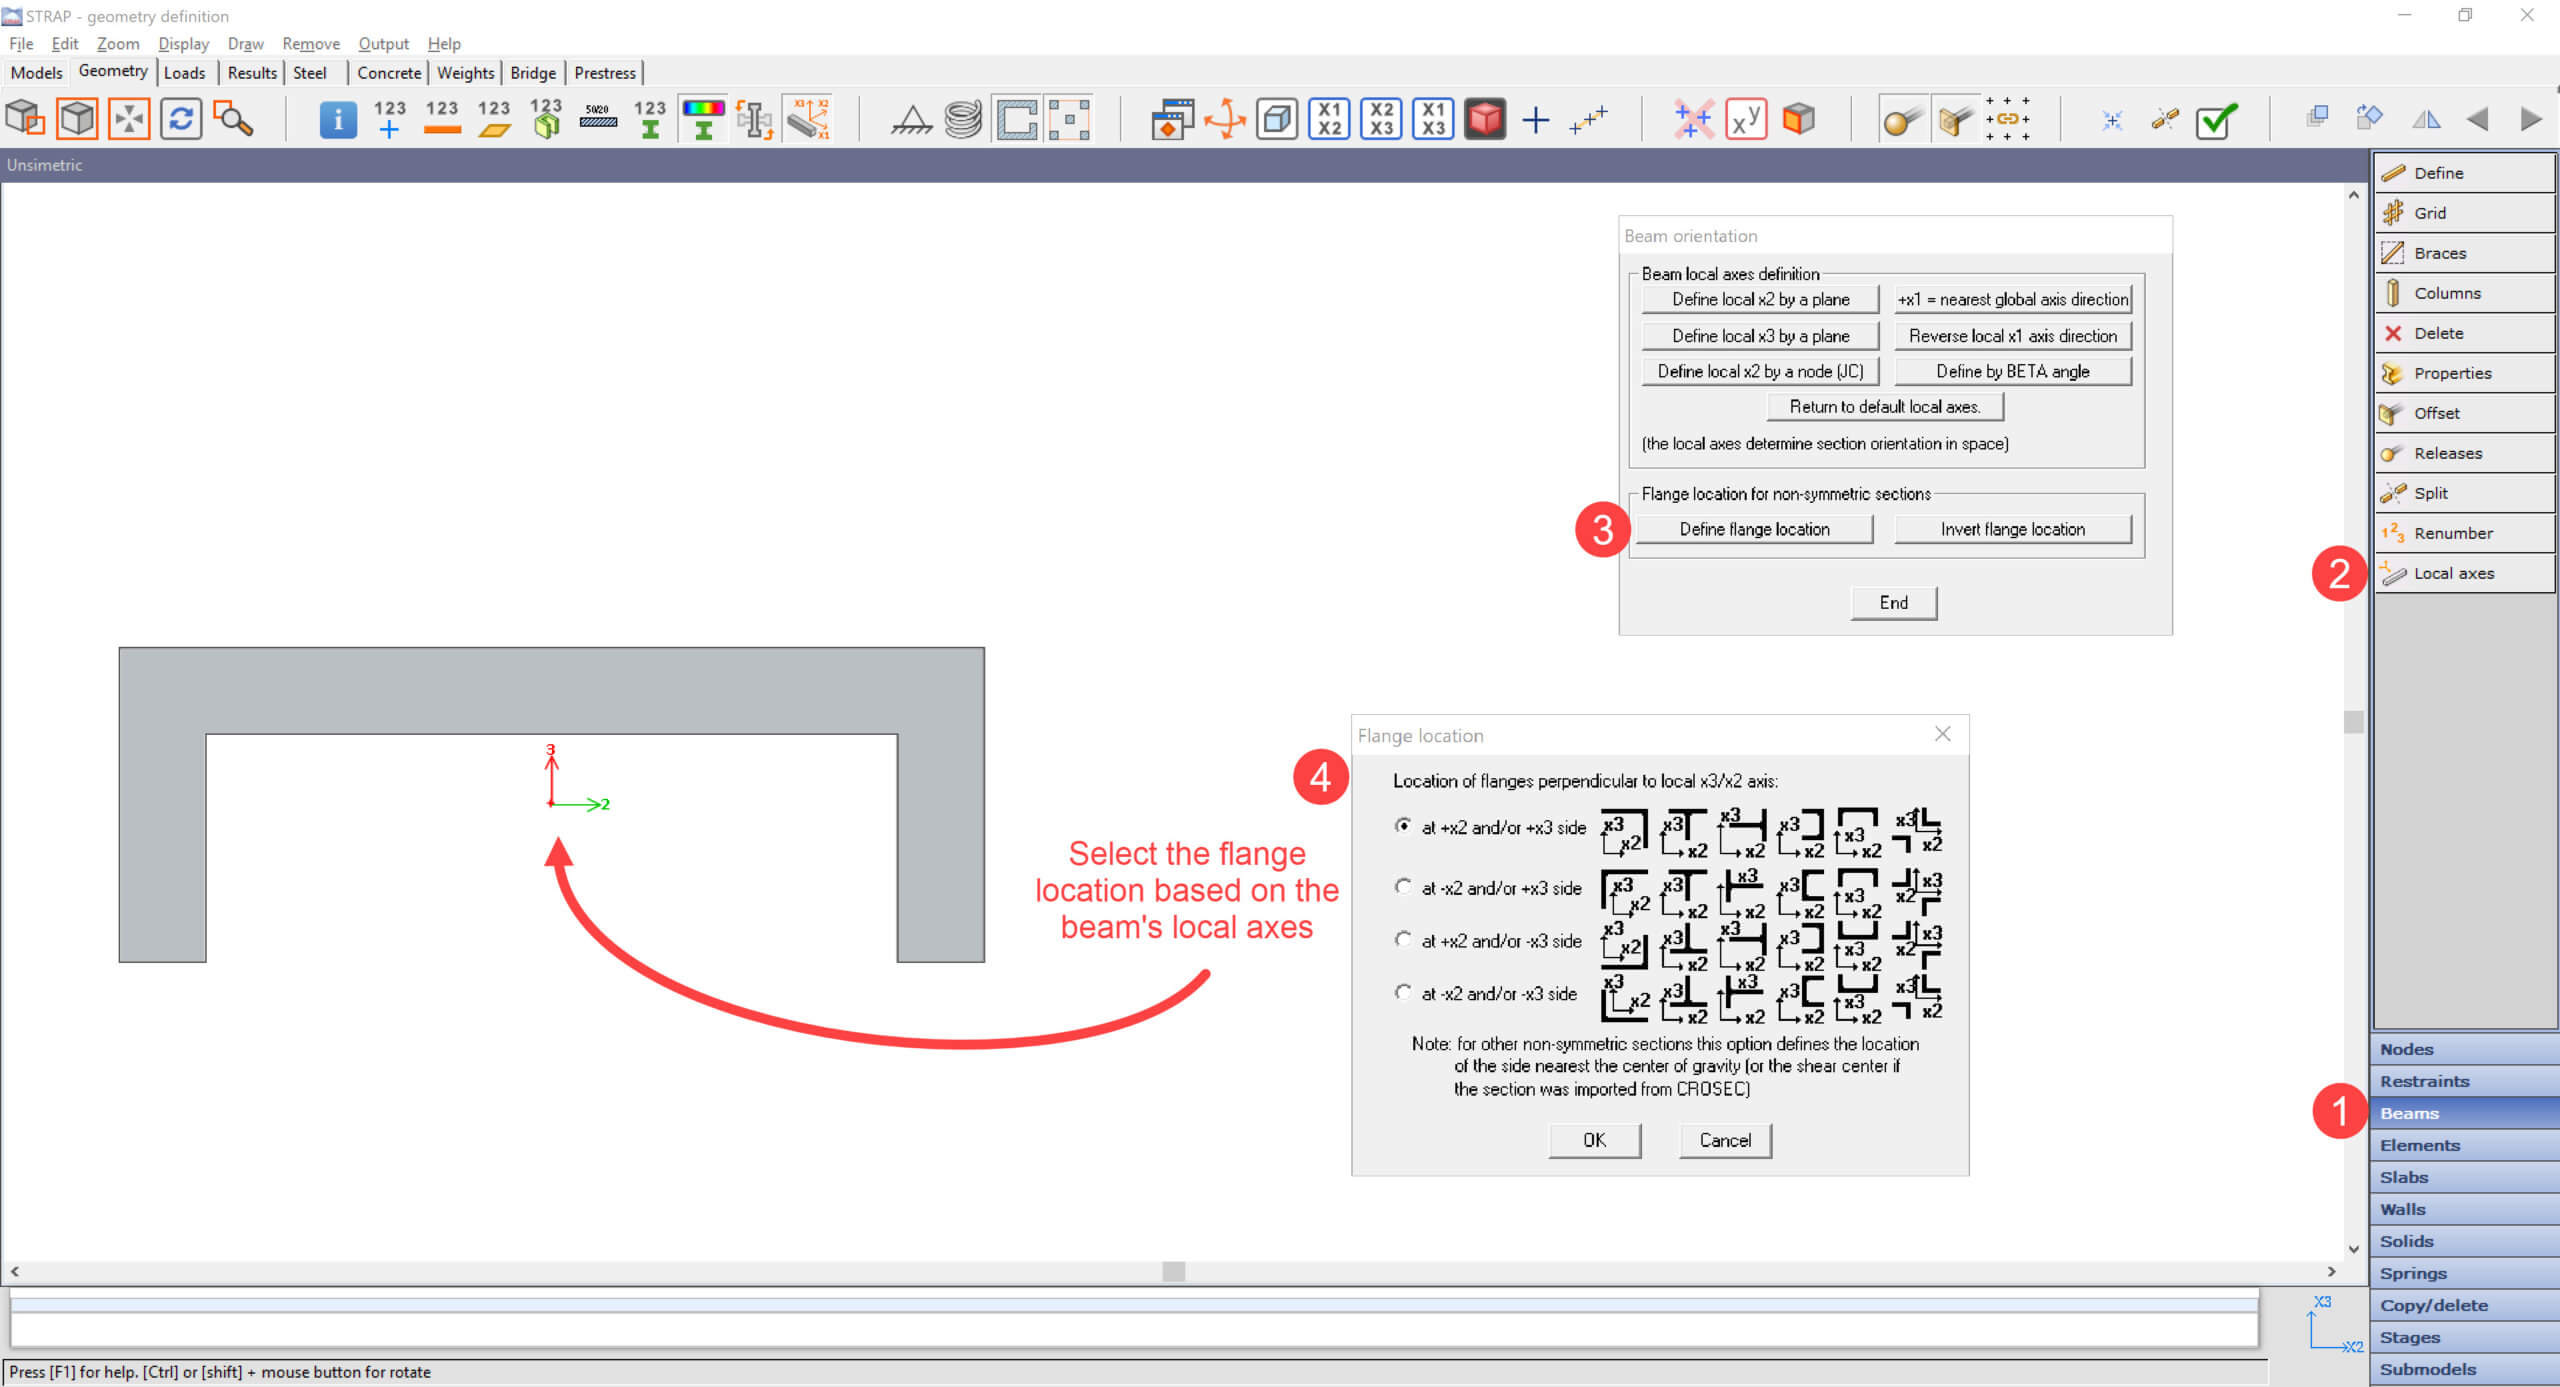
From the Geometry tab, Beams > Local axes > Define flange location > Select the flange location based on the beam’s local axes.
From the Concrete design drawing click Add > Select General arrangement drawing > Check “Display vertical reinforcement” for walls & columns > Select beam or element for slab selection > Select the slab > place the drawing on the layout.
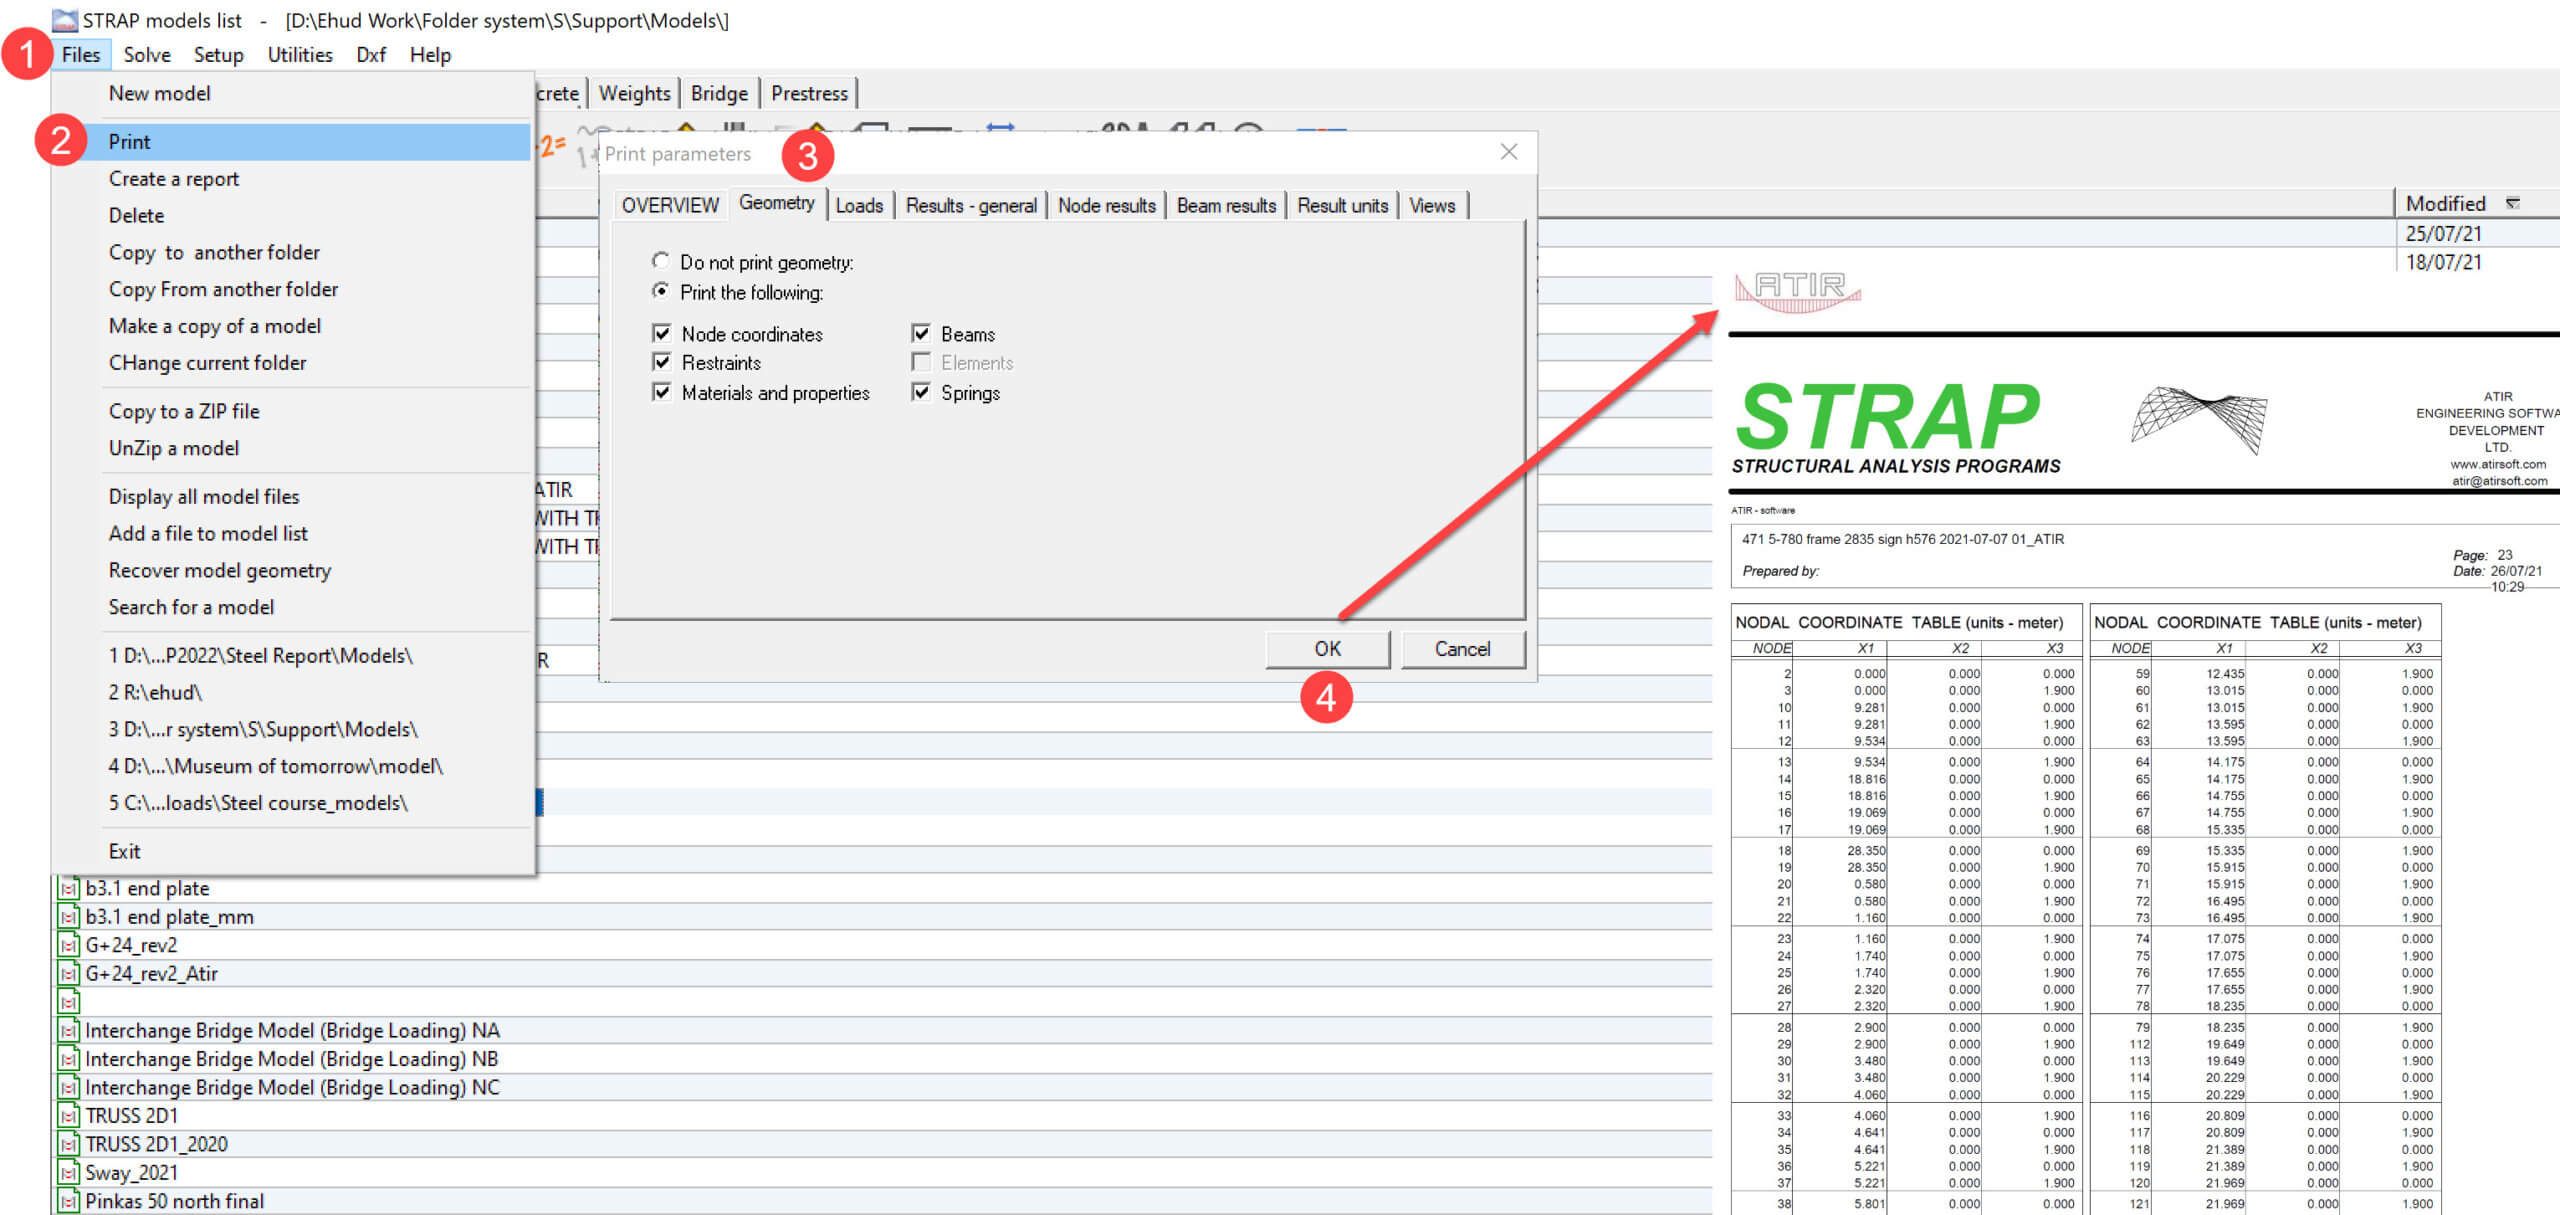
From the models tab > Highlight the model > Files > Print > Select the tables to be printed > Select OK to print.